Coupler.io Alternatives for Google Sheets: Which Connector Fits You?

Coupler.io is a popular way to pull business data into Google Sheets. However, it is not the right fit for everyone. Its pricing grows with the number of connections and rows, and many teams only need one or two data sources. If that sounds like you, several Coupler.io alternatives deserve a look.

In this post, we compare the main options for getting CRM, accounting, and e-commerce data into Google Sheets. Additionally, we explain when a focused single-source add-on beats a broad multi-source platform.

What to look for in a Sheets connector

Before you compare tools, decide what actually matters for your workflow:

  • Sources. Do you need twenty integrations, or just your CRM and your payment platform?
  • Scheduling. Can refreshes run automatically, even with the spreadsheet closed?
  • Two-way sync. Can you push edited data back to the source, or only pull it?
  • Filtering. Can you request a precise subset, or must you pull everything and filter in Sheets?
  • Pricing model. Per-connection and per-row pricing punishes growth. Flat pricing does not.

Keep these five points in mind. Meanwhile, let’s look at the options.

Option 1: G-Integrator — focused add-ons with two-way sync

G-Integrator takes a different approach from multi-source platforms. Instead of one tool with dozens of shallow connectors, it offers dedicated Google Sheets add-ons, each built deeply around one source:

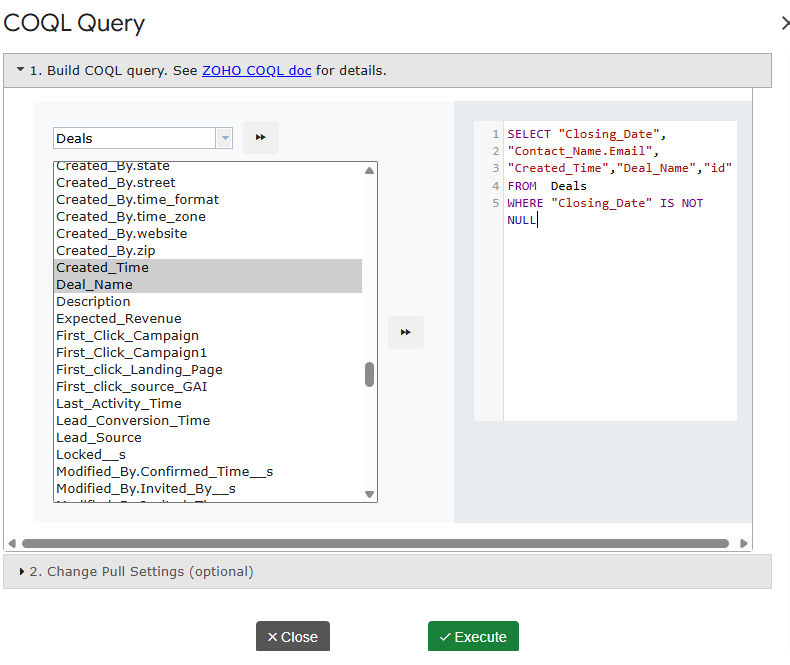
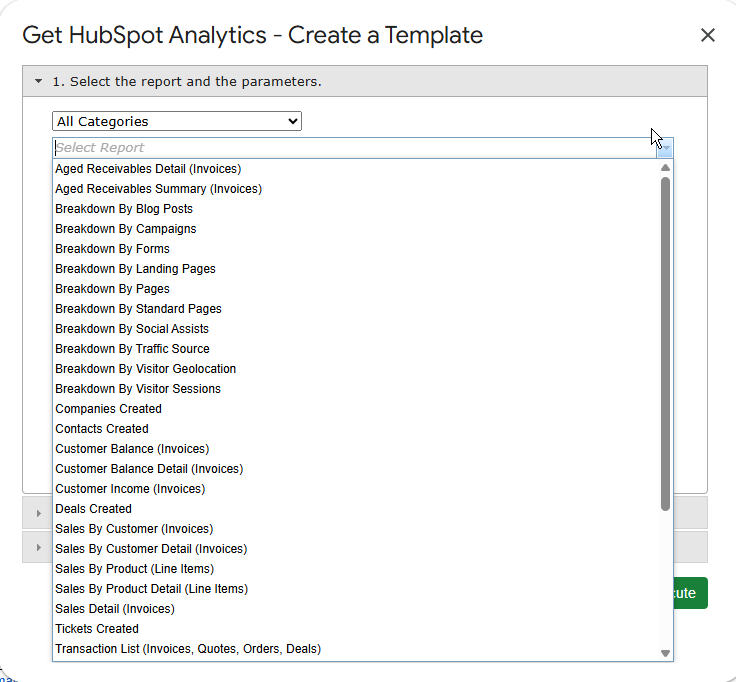
Because each add-on targets one platform, it goes deeper than a generic connector. For example, the Zoho CRM add-on supports COQL queries with WHERE clauses and lookup joins, and the HubSpot add-on ships a full report catalog. Furthermore, the CRM add-ons push data back: you can update, insert, or upsert records straight from a sheet — something pull-only connectors cannot do.

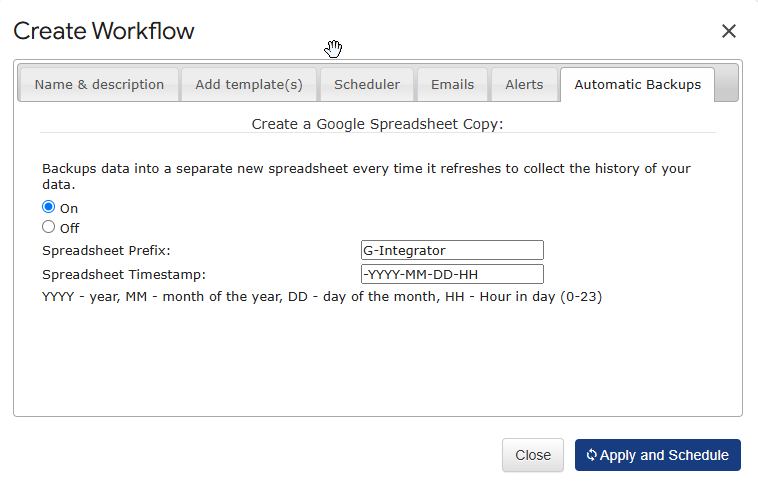
Scheduled workflows refresh your data from hourly to monthly, with optional email alerts and timestamped backups. The refresh runs even when the spreadsheet is closed.

Pricing: each add-on has a free two-week trial with full functionality, then a flat Premium plan. There is no per-row or per-connection metering, so costs stay predictable as your data grows.

Best for: teams that live in one or two platforms (HubSpot, Zoho, Shopify, or Stripe) and want depth, two-way sync, and flat pricing.

Option 2: Multi-source platforms (Coupler.io and similar)

Tools like Coupler.io shine when you genuinely need many sources in one place — for instance, an agency that blends ad platforms, analytics, and CRM data into one dashboard. They typically offer a wide catalog of connectors and destination options beyond Sheets.

The trade-offs are real, though. First, breadth usually comes at the cost of depth: generic connectors rarely support source-specific features like COQL queries or write-back. Second, usage-based pricing means the bill climbs as connections and rows grow. Therefore, check the current pricing page carefully against your expected volume before committing.

Best for: agencies and analysts combining many different sources into blended reports.

Option 3: Native exports and CSV imports

Every platform exports CSV files, and Google Sheets imports them. This costs nothing, so it is worth mentioning. Nevertheless, manual exports have a hidden price: someone must remember to run them, the formatting breaks constantly, and the data is stale the moment it lands. As a rule, CSV workflows survive about two weeks before someone asks for automation.

Best for: one-off pulls that you will never repeat.

Option 4: Apps Script and custom API code

If you have developer time, Google Apps Script can call any API directly. You get total control, and there is no subscription. On the other hand, you also own the maintenance: authentication, pagination, rate limits, retries, and every API version change. What starts as a weekend script often becomes an unowned liability after the author moves on.

Best for: engineering teams with unusual requirements and time to maintain code.

Side-by-side comparison

G-IntegratorCoupler.io-style platformsCSV exportCustom code
SourcesHubSpot, Zoho CRM, Zoho Books, Shopify, StripeManyAnyAny
Depth per sourceDeep (COQL, reports, related lists)GenericBasicUnlimited
Two-way syncYes (update/insert/upsert)RarelyNoIf you build it
Scheduled refreshHourly to monthlyYesNoIf you build it
Pricing modelFlat per add-onScales with usageFreeDeveloper time
Setup timeMinutesMinutes to hoursMinutes, repeatedlyDays

How to choose

The decision usually comes down to two questions. How many sources do you need? And do you need to write data back?

  • One or two of: HubSpot, Zoho CRM, Zoho Books, Shopify, Stripe → a focused G-Integrator add-on gives you more depth for a flat price.
  • Five or more unrelated sources → a multi-source platform earns its fee.
  • A single pull you will never repeat → just export a CSV.
  • Exotic requirements plus available developers → custom Apps Script.

Frequently asked questions

Is there a free Coupler.io alternative?

Fully free options are CSV exports and hand-written Apps Script. Both work, but both trade money for your time. G-Integrator offers a free two-week trial with full functionality, so you can confirm the fit before paying.

Can G-Integrator replace Coupler.io completely?

That depends on your sources. If your data lives in HubSpot, Zoho CRM, Zoho Books, Shopify, or Stripe, then yes — with more depth and two-way sync on top. If you also need ad platforms or databases, you may want a platform tool alongside.

Do the G-Integrator add-ons refresh data automatically?

Yes. Scheduled workflows run from hourly to monthly and work even when the spreadsheet is closed. You can also add email alerts and automatic timestamped backups.

Can I push data back to my CRM from Google Sheets?

Yes. The HubSpot and Zoho CRM add-ons support update, insert, and upsert from selected rows — a key difference from pull-only connectors.

Wrap-up

Coupler.io is a solid product for many-source reporting. Still, most teams pull from one or two systems, and for them a focused add-on is simpler, deeper, and cheaper. Pick the tool that matches your source list, not the longest feature table.

Ready to compare in practice? Browse the G-Integrator add-ons and start a free two-week trial for your platform. Setup takes minutes, and our Help Center walks you through every step.
How to Bulk Update Zoho CRM Records from Google Sheets

Editing records one by one in Zoho CRM is slow. Meanwhile, mass changes come up all the time: reassigning lead owners, fixing phone formats, updating deal stages after a pipeline change, or cleaning imported junk. The good news? You can bulk update Zoho CRM records straight from Google Sheets, where bulk editing is what spreadsheets do best.

In this guide, you will pull records into a sheet, edit them with familiar spreadsheet tools, and then push the changes back to Zoho CRM. No CSV exports, no import wizard, and no code.

Why edit Zoho CRM data in a spreadsheet?

Zoho CRM has a mass update tool, but it changes one field to one value at a time. In contrast, a spreadsheet gives you much more power:

  • Formulas. Fix phone formats, split names, or build values from other columns.
  • Find and replace. Correct a misspelled company name across 500 records at once.
  • Filters and sorting. Isolate exactly the rows that need a change before you touch anything.
  • A visible audit trail. You see every value before and after, side by side.

Moreover, the whole edit happens outside the CRM. As a result, nothing changes in Zoho until you explicitly push the rows back.

What you need

The add-on includes a free two-week trial, so you can run a full update cycle before paying anything.

Step 1: Pull the records you want to change

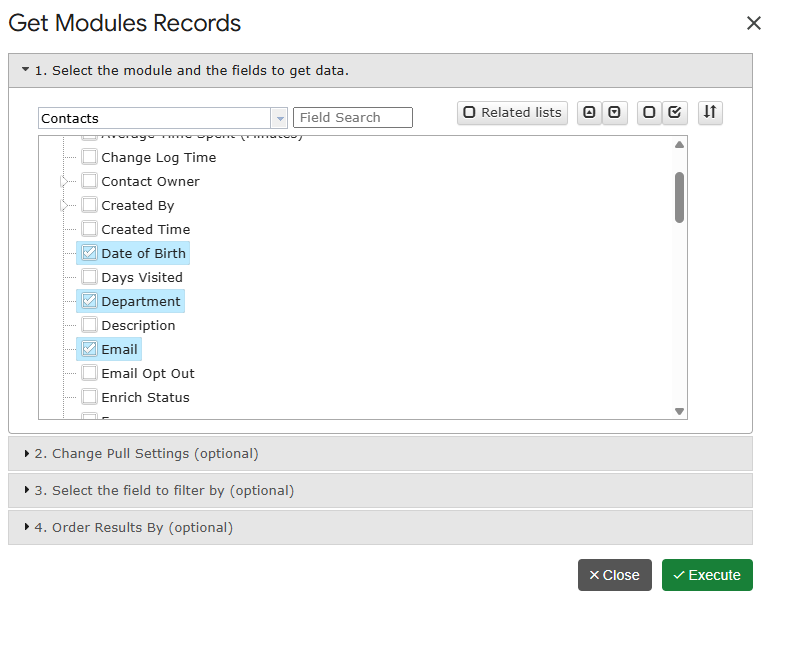
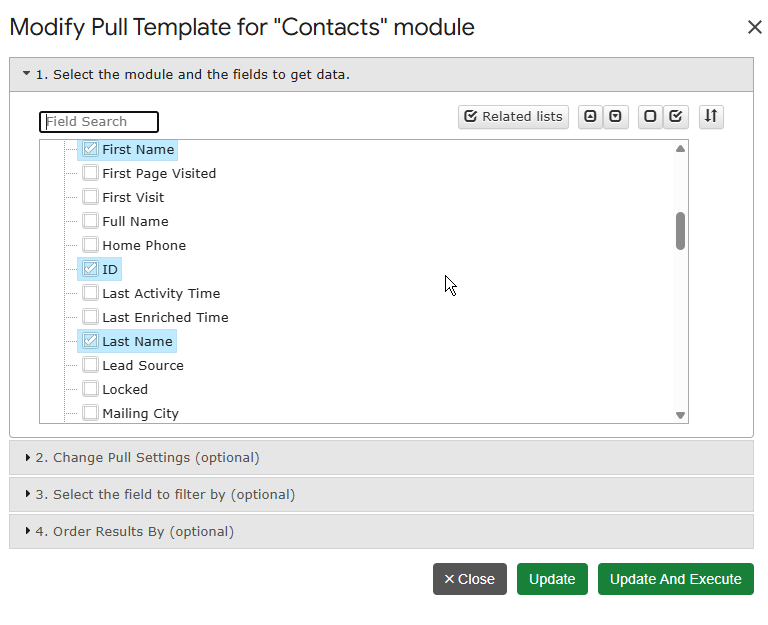
First, open your spreadsheet and connect the add-on to your Zoho account. Then click Get Module Records, pick the module (Contacts, Leads, Accounts, Deals, Tasks, or any custom module), and select the fields you plan to edit in the field tree. Finally, choose a start cell and click Execute.

Two tips make the next steps easier:

  • Always include the ID field. The record ID tells Zoho exactly which record to update, so matching is precise.
  • Pull only the columns you need. A narrow sheet is faster to edit and faster to upload.

The pull is auto-saved as a refreshable template. Therefore, you can rerun the same selection next week with one click.

Advanced: if you need a precise subset — for example, only leads created last quarter with no owner — use Get Data using COQL instead and write a query with a WHERE clause.

Step 2: Edit the data in bulk

Now the fun part. Because the data sits in Google Sheets, every spreadsheet trick applies:

  • Use find and replace to fix a recurring typo.
  • Add a helper column with a formula, then paste the results as values into the real column.
  • Sort by owner, filter by stage, and change hundreds of cells with one drag-fill.

However, keep two rules in mind. First, never edit the ID column — it is the key that links each row to its Zoho record. Second, keep picklist values exact: Zoho rejects values that do not match the field’s allowed options.

Step 3: Push the changes back to Zoho CRM

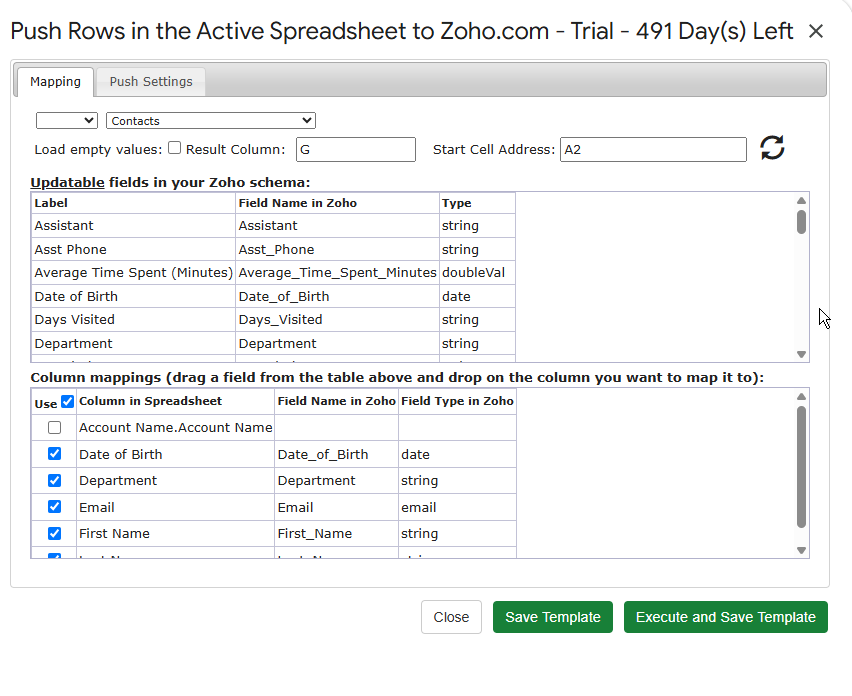
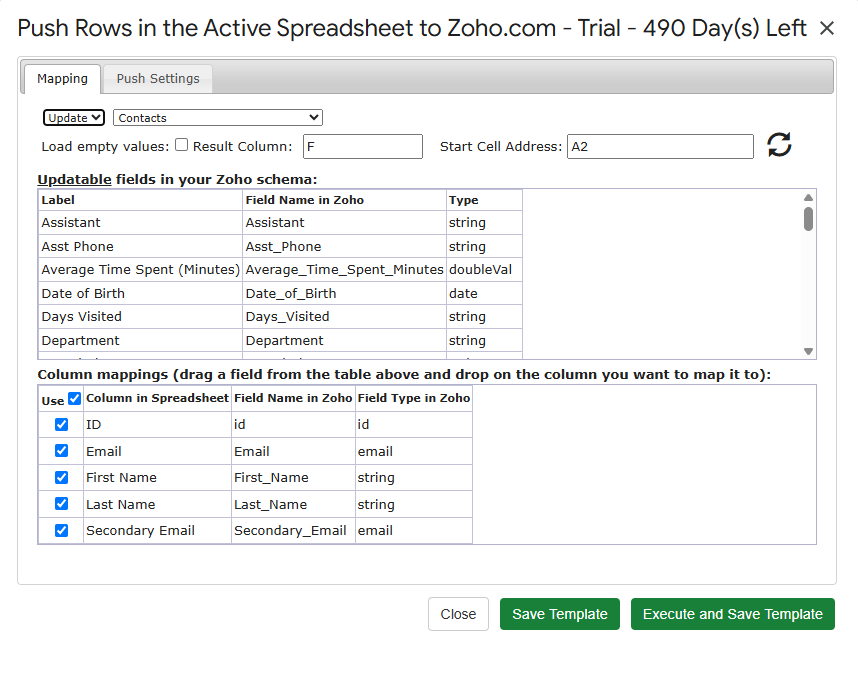
Once the rows look right, select them and click Update / Insert / Upsert Selected Row(s) in the add-on menu. A mapping dialog opens. There, you:

  1. Map each spreadsheet column to its Zoho field.
  2. Choose a result column, where the add-on writes a status for every row.
  3. Click Execute and Save Template.

The mapping is saved as a reusable template. Consequently, the next bulk update takes seconds: pull, edit, select, execute.

Update, insert, or upsert — which one?

  • Update changes existing records. Rows must carry a record ID.
  • Insert creates new records from the selected rows.
  • Upsert does both: it updates a row when a match exists and inserts it otherwise. This is ideal for mixed lists.

Step 4: Check the results

After the push, look at the result column. Each row shows its own status, so a partial failure never hides. If a few rows fail — usually due to a picklist mismatch or a required field — fix just those cells and push only the failed rows again. In other words, you never redo the whole batch.

Common bulk update scenarios

ScenarioHow to do it
Reassign lead ownerPull leads with Owner + ID, replace owner values, update
Fix phone formatsAdd a formula column, paste as values, update
Change deal stages in bulkFilter deals by stage, edit the Stage column, update
Merge cleanup after importFix values in Sheets, upsert the corrected list
Add new contacts + update old onesOne sheet, one upsert run

Frequently asked questions

Can I update custom modules and custom fields?

Yes. Get Module Records lists custom modules alongside standard ones, and the mapping dialog shows every field your Zoho edition exposes, including custom fields.

How many records can I update at once?

The add-on processes the rows you select and paginates the work automatically. Large batches simply take a little longer — you do not need to split them by hand.

Will this overwrite fields I did not map?

No. Only mapped columns change. Unmapped Zoho fields keep their current values.

Does this work on the free Zoho CRM edition?

Yes. The add-on works with any Zoho CRM edition. On the G-Integrator side, you get a free two-week trial; after that, pick a plan on the pricing page.

Can I undo a bulk update?

There is no automatic undo. However, an easy safeguard exists: before you push, duplicate the sheet tab. That copy holds the original values, so you can push them back if needed.

Wrap-up

Bulk edits do not have to mean CSV exports and import wizards. Instead, pull records with Get Module Records, clean them with spreadsheet tools, and push them back with Update / Insert / Upsert Selected Row(s). With saved templates on both sides, the second run takes under a minute.

Ready to try it on your own data? Install G-Integrator for Zoho CRM and start your free two-week trial. For the full mapping reference, see the Upload data to Zoho CRM guide in our Help Center.

Automatic HubSpot Data Backup to Google Sheets (Set It Once, Forget It)

Your HubSpot portal holds years of contact history, deal records, and company data. Yet most teams have no copy of it anywhere else. If someone deletes a list by mistake, or a bad import overwrites a thousand records, that data is simply gone. Fortunately, there is an easy fix: an automatic HubSpot backup to Google Sheets.

In this guide, you will set up a scheduled backup that runs on its own — hourly, daily, weekly, or monthly. Moreover, it keeps working even when the spreadsheet is closed. The whole setup takes about ten minutes, and you never write a single line of code.

Why back up HubSpot data at all?

HubSpot is reliable, but reliability is not the same as protection. Consider these common cases:

  • Human error. A teammate merges the wrong contacts or deletes a property. Afterwards, the old values are hard or impossible to restore.
  • Bad imports. One faulty CSV import can overwrite thousands of records in seconds.
  • Offboarding. When an employee leaves, you may want a snapshot of their pipeline before access changes.
  • Audits and reporting. Sometimes you need to prove what a deal looked like last quarter, not what it looks like today.

HubSpot’s own recycle bin helps with some deletions. However, it does not protect you from overwrites, and it does not give you point-in-time history. A scheduled export to Google Sheets does both — and it costs far less than enterprise backup tools.

What you need

  • A HubSpot account (any tier works, including the free CRM)
  • A Google account with Google Sheets
  • The G-Integrator for HubSpot add-on from the Google Workspace Marketplace

The add-on comes with a free two-week trial, so you can test the full backup workflow before you pay anything.

Step 1: Connect HubSpot to Google Sheets

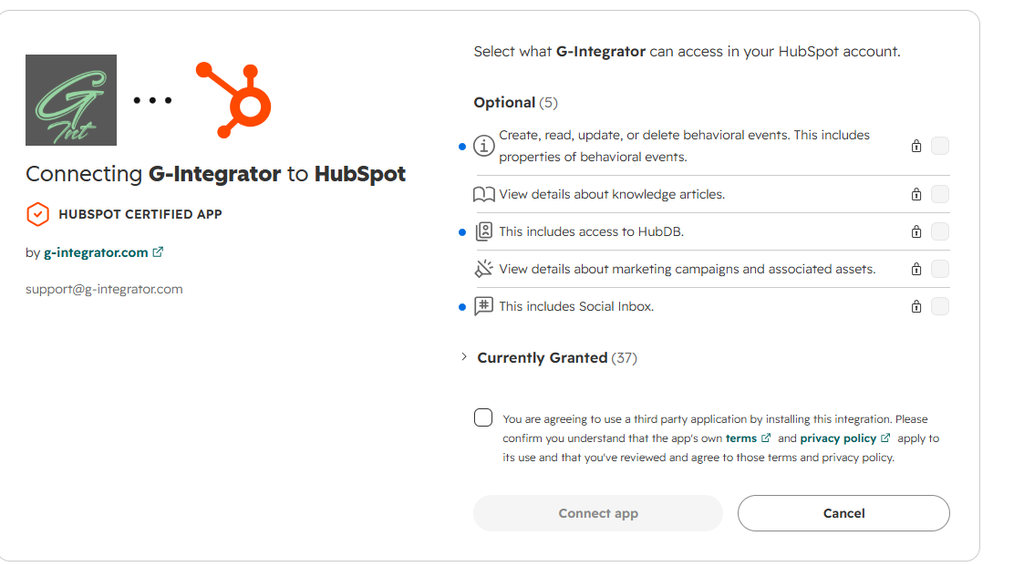
First, install the add-on from the Google Workspace Marketplace. Then open a new spreadsheet and go to Extensions → G-Integrator for HubSpot → Connect. Sign in to HubSpot and approve access. That’s it — the connection is now stored securely, so you only do this once.

Step 2: Build the templates you want to back up

Next, decide which data matters most. For most teams, that means contacts, deals, and companies. For each one:

  1. Open Get HubSpot Data from the add-on menu.
  2. Select the object (for example, Contacts) and pick the properties you want to keep.
  3. Run it once to pull the data into a sheet.

Each pull is saved as a reusable template. As a result, you can rerun any of them with one click via Refresh HubSpot Data — and, more importantly, a schedule can rerun them for you.

Tip: Put each object on its own sheet tab. In other words, one tab for contacts, one for deals, one for companies. This keeps every backup clean and easy to search later.

Step 3: Schedule the automatic backup

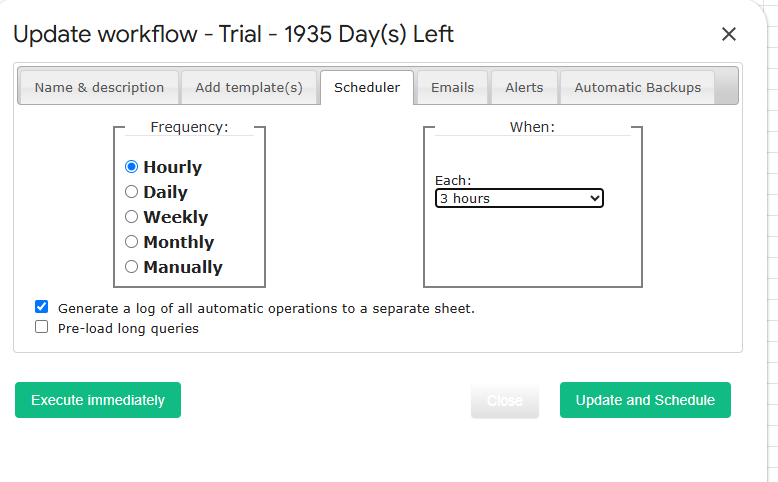
Now for the part that makes this a true backup instead of a manual chore. Open Automation… → Create Workflow in the add-on menu. Then:

  1. Add the templates you built in Step 2 to the workflow.
  2. Pick a frequency — anywhere from hourly to monthly.
  3. Set the execution time that suits your team.
  4. Optionally, turn on email notifications so you know each run has finished.

From this point on, the add-on refreshes your data on schedule. Crucially, the refresh runs even when the spreadsheet is closed. You do not need to keep a browser tab open or remember to click anything.

Step 4: Turn on timestamped snapshot copies

A refresh alone overwrites the sheet with current data. That is useful, but a real backup also needs history. Therefore, enable automatic backups in the same Automation… menu: the add-on can create a timestamped copy of the spreadsheet on every refresh.

With this option on, you get a growing archive of dated snapshots in Google Drive. Consequently, you can answer questions like “what did this deal look like on March 1st?” just by opening the right copy.

Step 5: Verify and maintain the workflow

Finally, a quick health check keeps everything running smoothly:

  • Review your schedules. The Automation… menu lists every spreadsheet with active workflows, so you always know what runs where.
  • Repair if needed. If a workflow ever stops (for instance, after a password change), the repair option under Automation… reinitializes the trigger in one click.
  • Watch the notifications. If you enabled email alerts, a missing email is your early warning sign.

How often should you back up?

It depends on how fast your data changes. As a rule of thumb:

Team size / activitySuggested frequency
Small team, slow pipelineWeekly
Active sales teamDaily
High-volume portal, frequent importsHourly

Remember that timestamped copies take Drive storage. Because of that, hourly snapshots of a huge portal can add up — daily is the sweet spot for most teams.

Bonus: get alerted when data changes unexpectedly

Backups protect you after something goes wrong. Alerts warn you while it happens. Under the same Automation… menu, you can set cell-value alerts that email you when a number crosses a threshold — for example, when your total contact count suddenly drops. Combined with scheduled backups, this gives you both a warning system and a recovery path.

Frequently asked questions

Does the backup run when my spreadsheet is closed?

Yes. Scheduled workflows run in the background on Google’s servers. You can close the tab, shut your laptop, and the refresh still happens on time.

Can I back up custom properties and custom objects?

Yes. The template builder lets you pick any properties available in your portal, including custom ones. Build a template per object and add them all to one workflow.

Does this work on the free HubSpot plan?

Yes. The add-on works with any HubSpot tier, including the free CRM. No Operations Hub or paid HubSpot add-ons are required.

How much does it cost?

G-Integrator for HubSpot offers a free two-week trial with full functionality. After the trial, you pick a Premium plan — see the pricing page for current rates.

Can I restore data back into HubSpot from a backup?

Yes. The add-on includes Upload Data to HubSpot, so you can push corrected values from a snapshot sheet back into your portal.

Wrap-up

Losing CRM data hurts, and it usually happens without warning. However, a ten-minute setup removes that risk: connect the add-on, build templates for contacts, deals, and companies, schedule a workflow, and switch on timestamped copies. After that, your HubSpot backup to Google Sheets runs itself.

Ready to protect your portal? Install G-Integrator for HubSpot and start your free two-week trial today. For details on schedules, alerts, and repair options, see the Automation & workflows guide in our Help Center.

Zoho CRM COQL Queries from Google Sheets: Joins and One-to-Many Pulls


Zoho CRM’s standard export gives you one module at a time. That works fine for a flat contact list. However, the moment you need deals joined with their accounts, or contacts filtered by a field on a parent record, flat exports fall short.

This is the job of Zoho CRM COQL queries. COQL — CRM Object Query Language — is Zoho’s SQL-like query language. In this guide, you will run COQL from Google Sheets with the G-Integrator for Zoho CRM add-on. First, we will cover the syntax. Then we will walk through real examples, including joins and one-to-many pulls.

What is COQL?

COQL lets you query Zoho CRM records with SELECT statements, much like SQL:

SELECT Last_Name, Email, Lead_Source
FROM Contacts
WHERE Lead_Source = 'Web'

If you know basic SQL, you already know most of COQL. Still, there are a few Zoho-specific rules to keep in mind:

  • A WHERE clause is required. Zoho rejects queries without one. If you want all records, use a condition that always holds, such as WHERE id is not null.
  • Field names use API names. Write “Account_Name", not “Account Name”. You can check API names under Setup → Developer Space → APIs in Zoho, or simply pick fields from the add-on’s field list.
  • Joins work through lookup fields. Dot notation reaches fields on a related record, up to two relations deep.

What you’ll need

  • A Zoho CRM account (any edition)
  • A Google account
  • The G-Integrator for Zoho CRM add-on from the Google Workspace Marketplace — it comes with a free two-week trial

No API keys and no code outside the query itself. Moreover, the add-on handles paging for you, so large results arrive in full.

Step 1: Connect Google Sheets to Zoho CRM

First, install the add-on in a Google Sheets spreadsheet. Then open:

Extensions → G-Integrator for Zoho CRM → Zoho Sign In

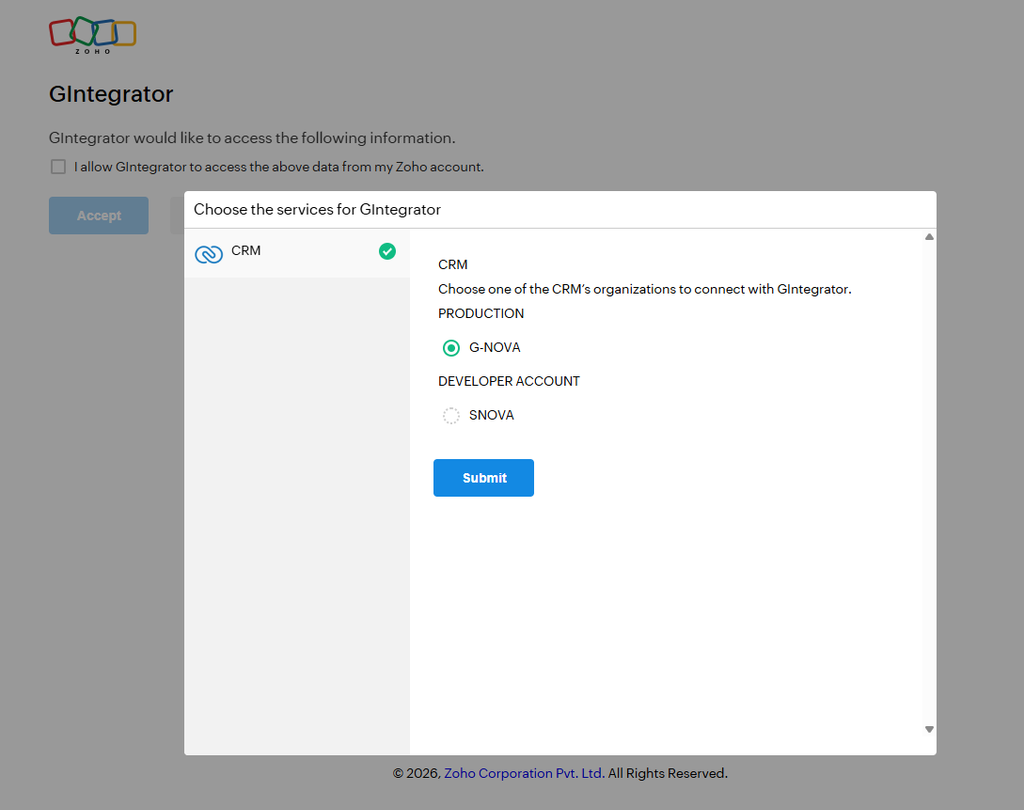
Sign in through Zoho’s own consent screen. The add-on never sees your password, and you can revoke access from your Zoho account at any time.

Step 2: Run your first COQL query

Next, click Get Data using COQL in the add-on menu. Type your query into the editor and run it:

SELECT Last_Name, First_Name, Email, Created_Time
FROM Contacts
WHERE Created_Time > '2026-01-01T00:00:00-05:00'

The matching rows land in your sheet, one record per row, with a header row on top.

Additionally, the add-on saves the query as a template. As a result, you can re-run it later with one click — or on a schedule, as we will see below.

Example queries you can copy

Filter by a picklist and sort

SELECT Deal_Name, Amount, Stage, Closing_Date
FROM Deals
WHERE Stage = 'Negotiation/Review'
ORDER BY Closing_Date asc

Join: pull account fields onto each deal

Lookup fields act as your join keys. For instance, each deal has an Account_Name lookup, so you can reach fields on the account through dot notation:

SELECT Deal_Name, Amount, Account_Name.Account_Name, Account_Name.Industry
FROM Deals
WHERE Amount > 10000

Every row now shows the deal next to its account’s name and industry. In SQL terms, this is an inner join — yet you wrote no JOIN clause at all.

Two levels deep

COQL follows lookups across two relations. For example, from a contact you can reach the owner of its parent account:

SELECT Last_Name, Account_Name.Account_Name, Account_Name.Owner.last_name
FROM Contacts
WHERE Account_Name is not null

One-to-many: repeat the parent for each child

A one-to-many pull lists child records with their parent’s fields on every row. To do that, query the child module and join up to the parent:

SELECT Account_Name.Account_Name, Deal_Name, Amount, Stage
FROM Deals
WHERE Account_Name.Industry = 'Technology'
ORDER BY Account_Name.Account_Name asc

The result reads like a report: each account appears once per deal, ready for a pivot table. Afterwards, you can group by account in the sheet to get totals per parent.

Multiple conditions

SELECT Last_Name, Email, Lead_Source, City
FROM Leads
WHERE (Lead_Source = 'Web' or Lead_Source = 'Referral') and City is not null

Wrap OR groups in parentheses, just as you would in SQL.

Step 3: Refresh your queries on a schedule

Finally, put the whole thing on autopilot. Open Workflows in the add-on menu and attach your saved COQL template to a schedule — hourly, daily, or weekly.

From then on, the sheet re-runs the query and rewrites the rows on its own. Consequently, any chart or pivot table built on that tab stays current without any clicks. See the automation guide for the details.

COQL tips and common errors

  • “WHERE clause is mandatory.” Add WHERE id is not null when you want everything.
  • Unknown field. Use the API name, not the display label. Find API names under Setup → Developer Space → APIs in Zoho CRM.
  • Dates and times. Use ISO format with a timezone offset, e.g. '2026-01-01T00:00:00-05:00'.
  • Large results. Zoho returns records in pages. The add-on pages through them for you, so you get the full result set in one run.
  • Start small. Test with a tight WHERE clause first. Then widen it once the columns look right.

What does it cost?

G-Integrator for Zoho CRM comes with a free two-week trial, so you can test COQL pulls, templates, and workflows with your own data before you pay. After that, Premium plans bill monthly or yearly. Check the pricing page for current plans.

Frequently asked questions

Do I need to know SQL to use COQL?

Basic SELECT/WHERE knowledge is enough. In fact, the examples above cover most day-to-day needs — copy one and swap in your fields.

Can COQL join Zoho CRM modules?

Yes, through lookup fields. Dot notation such as Account_Name.Industry reaches fields on the related record, up to two relations deep.

How do I pull one-to-many data, like all deals per account?

Query the child module (Deals) and select parent fields through the lookup. Each child row then carries its parent’s fields, which makes grouping in Google Sheets easy.

Can the query refresh automatically?

Yes. Save the query as a template, then attach it to a workflow. The add-on re-runs it hourly, daily, or weekly and rewrites the rows in your sheet.

Which Zoho CRM editions support COQL?

COQL is part of Zoho’s API v2 and later, and it is available on standard editions. The add-on talks to that API, so if your edition has API access, COQL works.

Wrap-up

Flat exports answer flat questions. For joined and one-to-many data, COQL is the sharper tool — and with G-Integrator, it runs right inside Google Sheets, on a schedule if you like. Install G-Integrator for Zoho CRM, paste one of the examples above, and you will have joined CRM data in your sheet within five minutes. The two-week trial gives you full access to try it with your own modules.

HubSpot Reports in Google Sheets Without Operations Hub

HubSpot ships its own Google Sheets sync, but there is a catch: the two-way sync lives in Operations Hub, and the useful parts sit behind the paid tiers. If you only want your HubSpot reports in Google Sheets, that price is hard to justify.

The good news? You don’t need Operations Hub at all. In this guide, you will pull contacts, companies, and deals into a sheet with the G-Integrator for HubSpot add-on. After that, you will run ready-made reports and set them to refresh on a schedule.

Why not just use Operations Hub?

Operations Hub is a strong product for data sync across many apps. However, it is a poor fit when your goal is simple reporting:

  • Price. The features most teams want start on the paid tiers, and the cost grows with your contact count. In contrast, a focused Sheets add-on costs a fraction of that.
  • Scope. Operations Hub syncs objects between apps. It does not build report tables such as aging buckets, sales by product, or traffic breakdowns for you.
  • Setup. Sync mappings take time to plan and test. A report pull, on the other hand, takes a few clicks.

So if your goal is “get my HubSpot data into a spreadsheet and keep it fresh,” a lighter tool does the job better.

What you’ll need

  • A HubSpot account — any tier works, including the free CRM
  • A Google account
  • The G-Integrator for HubSpot add-on from the Google Workspace Marketplace — it comes with a free two-week trial

No API keys and no code. The add-on talks to HubSpot through the official API, so your data stays between HubSpot and your sheet.

Step 1: Connect Google Sheets to HubSpot

First, install the add-on in a Google Sheets spreadsheet. Then open:

Extensions → G-Integrator for HubSpot → HubSpot Sign In

Click through HubSpot’s consent screen and grant access. The add-on never sees your password. Also, you can remove the app from your HubSpot account at any time under Settings → Connected Apps.

If you manage more than one portal, pick the one you need. You can switch later.

Step 2: Pull contacts, companies, and deals

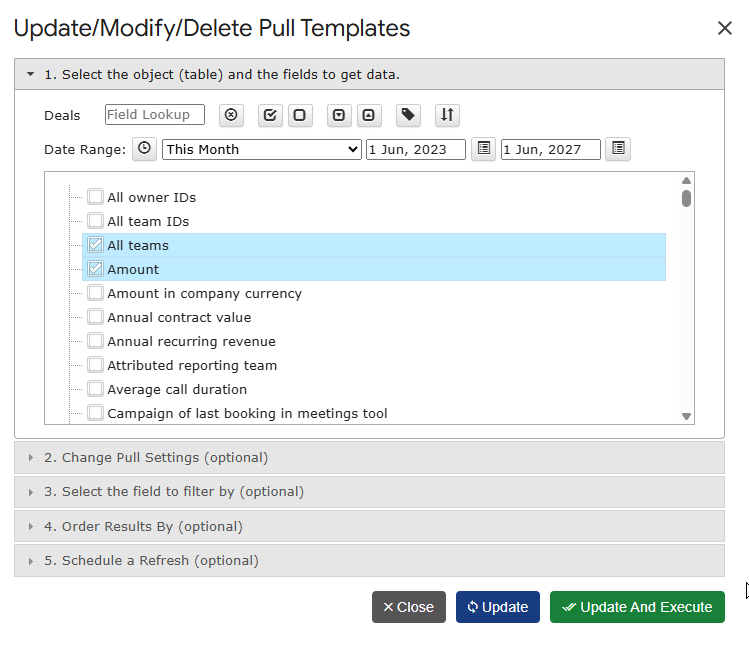
Next, open Get Data from HubSpot in the add-on menu. In the dialog:

  1. Pick an object — Contacts, Companies, Deals, or Tickets.
  2. Select the properties you want as columns.
  3. Add filters so you only pull the rows you need — for example, deals created this quarter.
  4. Run the pull.

Your records land in the sheet in seconds, one row per record. Moreover, the add-on saves your choices as a template. As a result, every later pull — manual or scheduled — uses the same object, properties, and filters.

Step 3: Run ready-made HubSpot reports in Google Sheets

This is where the add-on goes far past a plain export. Open:

Get HubSpot Analytics… → Get Custom Reports

Here you will find 35+ built-in reports that HubSpot itself does not offer as flat tables. For example:

  • Sales reports — Sales by Customer, Sales by Product, and Sales Detail, built from your invoices and line items.
  • Aging and balances — Aged Receivables Detail and Summary, with overdue buckets (Current / 1–30 / 31–60 / 61–90 / 91+), plus Customer Balance reports.
  • Transaction lists — invoices, quotes, orders, and deals merged into one clean, date-ordered list.
  • CRM activity — contacts, companies, deals, and tickets created over time.
  • Marketing breakdowns — sessions, contacts, and customers by traffic source, campaign, form, landing page, or blog post.

Pick a report, choose a date range, and run it. The result lands in your sheet as a tidy table, ready for pivot tables and charts.

Additionally, you can set a dynamic date range such as “last 30 days.” The report then moves its window forward on every refresh. For the full list, see the report catalog.

Step 4: Schedule automatic refreshes

Finally, stop refreshing by hand. Open Workflows in the add-on menu and create a workflow that re-runs your pulls and reports on a schedule — hourly, daily, or weekly.

From then on, your sheet updates itself. Consequently, every chart, pivot table, and dashboard built on top of it stays current too. You can also add email alerts, so your team gets a message when fresh numbers arrive.

Bonus: push updates back to HubSpot

Although this guide focuses on reports, the add-on also works in the other direction. With Upload Data to HubSpot, you can insert, update, or upsert records straight from your sheet, with column-to-property mapping. In other words, you get the two-way part of Operations Hub for the objects that matter, without the price tag. See the upload guide for details.

What does it cost?

G-Integrator for HubSpot comes with a free two-week trial, so you can test every feature — pulls, reports, workflows, and uploads — before you pay. After the trial, Premium plans bill monthly or yearly, and they cost far less than an Operations Hub seat. Check the pricing page for current plans.

Frequently asked questions

Do I need Operations Hub or a paid HubSpot tier for this?

No. The add-on works with every HubSpot tier, including the free CRM. It reads your data through the official HubSpot API.

Can I refresh HubSpot reports in Google Sheets automatically?

Yes. Workflows re-run your pulls and reports on an hourly, daily, or weekly schedule. Dynamic date ranges move forward on their own.

Which HubSpot objects can I pull into a sheet?

Contacts, companies, deals, and tickets, plus invoices, quotes, orders, line items, custom objects, and HubDB tables. The 35+ built-in reports cover sales, aging, balances, CRM activity, and marketing analytics.

Is my HubSpot data safe?

Yes. You sign in through HubSpot’s own consent screen, and the add-on never sees your password. Furthermore, you can revoke access from your HubSpot settings at any time.

Can I write data back to HubSpot from Google Sheets?

Yes. The upload feature inserts, updates, or upserts records from your sheet with column mapping, so you can fix data in bulk without Operations Hub.

Wrap-up

Operations Hub earns its keep when you sync many apps in both directions. For reporting, though, it is too much tool at too high a price. Instead, install G-Integrator for HubSpot, connect your portal, and pull your first report in the next five minutes — the two-week trial gives you full access to see it work with your own data.

How to Sync Zoho CRM with Google Sheets: Import, Update, and Schedule Refreshes

Your CRM holds the data. Your spreadsheet is where you work with it. Yet moving records between Zoho CRM and Google Sheets by hand – export, download, import, clean up – wastes time and breaks the moment someone edits a record.

This guide shows you how to set up a Zoho CRM Google Sheets integration with the G-Integrator for Zoho CRM add-on. First, you will pull leads, contacts, or deals into a sheet. Then you will push changes back to the CRM. Finally, you will schedule automatic refreshes, so your sheet stays current on its own.

What you’ll need

  • A Zoho CRM account (any edition)
  • A Google account
  • The G-Integrator for Zoho CRM add-on from the Google Workspace Marketplace – it comes with a free two-week trial

No API keys and no code. The add-on talks to Zoho through the official API.

Step 1: Connect Google Sheets to Zoho CRM

First, install the add-on in a Google Sheets spreadsheet. Then open:

Extensions – G-Integrator for Zoho CRM – Zoho Sign In

Click through Zoho’s sign-in flow and grant access. The add-on never sees your password. Also, you can revoke access from your Zoho account at any time.

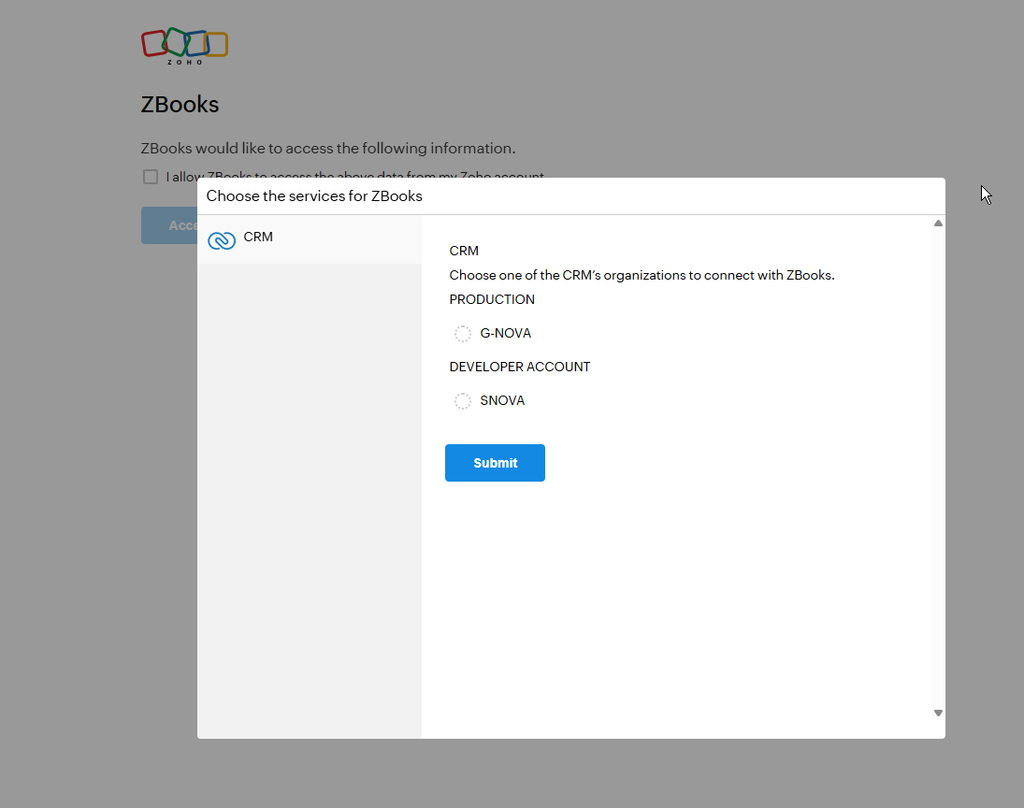
If you belong to several Zoho organizations, choose the one you need. You can switch later.

Step 2: Import records into your sheet

Next, click Get Module Records in the add-on menu. In the dialog:

  1. Pick a module – Contacts, Leads, Accounts, Deals, or any custom module.
  2. Select the fields you want as columns.
  3. Add filters if you only need part of the data – for example, leads created this month.
  4. Run the pull.

Your records land in the sheet in seconds, one row per record. Moreover, the add-on saves your choices as a template. So the next pull – manual or scheduled – uses the same module, fields, and filters.

Pull related lists too

Need the records linked to a parent record – say, all deals under each account? Then use Get Related Lists. Pick the parent module and the related list, and the add-on flattens the result into rows.

Power users: query the CRM directly

If you know exactly what you want, click Get Data using COQL and write a query in Zoho’s CRM Query Language. This supports joins and one-to-many pulls. For examples, see our COQL guide.

Step 3: Push changes back to Zoho CRM

A one-way export is only half the story. With G-Integrator, you can also update the CRM from your sheet.

Edit the rows you need, select them, and then choose:

Update / Insert / Upsert Selected Row(s)

Map your spreadsheet columns to CRM fields once, and the add-on saves the mapping for next time. As a result, bulk edits become simple: fix fifty phone numbers in the sheet, select the rows, and push them back in one action.

  • Update changes existing records.
  • Insert creates new ones.
  • Upsert does both – it updates a record when it exists and creates it when it does not.

Step 4: Schedule automatic refreshes

Finally, remove the manual step for good. Open:

Automation – Create Workflow

Choose the pull templates you want to refresh and set a schedule – hourly, daily, or weekly. From then on, the add-on reruns the pulls and rewrites the sheet by itself. In addition, workflows can email you after each run, so you know the data is fresh.

Bonus: 25+ built-in CRM reports

Besides raw records, the add-on ships with more than 25 ready-made reports. Open Reports – Custom Reports and pick one – sales analytics, aging, balances, inventory, and more. Each report renders straight into your sheet and can join the same refresh schedule. Browse the full list in the report catalog.

Do you use Zoho Analytics as well? Then open Reports – Zoho Analytics to pull Analytics reports, views, and tables into the same spreadsheet.

Manual export vs. a live integration

Manual CSV exportG-Integrator
Time per update5-10 minutesZero – runs on schedule
Data freshnessStale right awayRefreshed hourly, daily, or weekly
Write-back to CRMRe-import by handUpdate / Insert / Upsert from the sheet
Filters and fieldsRe-picked every timeSaved as reusable templates
ReportsBuild your own25+ built in

Frequently asked questions

Is there a free plan?

No, but there is a free two-week trial with every feature enabled. After that, pick a plan on the pricing page.

Which modules can I pull?

All standard modules – Leads, Contacts, Accounts, Deals, Tasks, and so on – plus your custom modules. Related lists work too.

Can several people share the same templates?

Yes. Use Manage Templates on Cloud to share pull templates across your team, so everyone runs the same queries. See templates and sharing.

Will scheduled refreshes overwrite my formulas?

The refresh rewrites the data range of the pull. Therefore, keep your own formulas and charts on a separate tab that reads from the data tab.

Is my CRM data safe?

Yes. The add-on connects through Zoho’s official sign-in flow and never stores your password. Data moves directly between Zoho CRM and your Google Sheet.

Get started

Install G-Integrator for Zoho CRM from the Google Workspace Marketplace and start your free two-week trial. Ten minutes later, your leads, contacts, and deals will live in Google Sheets – and stay current without you. Learn more on the product page or in the quickstart guide.

Zoho Books Reports in Google Sheets: Balance Sheet, P&L and Cash Flow on Autopilot

Zoho Books has solid built-in reports. However, they live inside Zoho Books. So every time your accountant, investor, or team lead asks for numbers, you export a PDF or copy cells by hand. Then next month, you do it all again.

There is a simpler way. With G-Integrator for Zoho Books, you can run Zoho Books reports in Google Sheets directly. First, you pick a report. Then the add-on builds it in your sheet from live Zoho Books data. After that, a schedule keeps it fresh – no more monthly copy-paste.

In this guide, you will set up three core reports: the Balance Sheet, the Profit and Loss, and the Cash Flow. You will also see how to refresh them on a schedule.

Why build reports in Google Sheets at all?

Because a spreadsheet is where the rest of your work happens. For example:

  • You can add your own formulas, charts, and notes next to real numbers.
  • You can share one link with your accountant instead of sending PDF files.
  • You can combine several reports on one tab and build a simple dashboard.
  • Also, Google Sheets keeps version history, so you can look back at any point in time.

In short, Zoho Books stays your source of truth. Meanwhile, Google Sheets becomes your reporting layer.

What you’ll need

  • A Zoho Books account (any plan)
  • A Google account
  • The G-Integrator for Zoho Books add-on from the Google Workspace Marketplace – it comes with a free two-week trial

Step 1: Connect Google Sheets to Zoho Books

First, open a spreadsheet and install the add-on. Then open:

Extensions – G-Integrator for Zoho Books – Zoho Sign In

Sign in with your Zoho account. The add-on uses Zoho’s official sign-in flow, so it never sees your password. In addition, you can revoke access from your Zoho account at any time.

If you manage more than one organization, pick the right one from the list. You can switch later with one click.

Step 2: Run your first report – the Balance Sheet

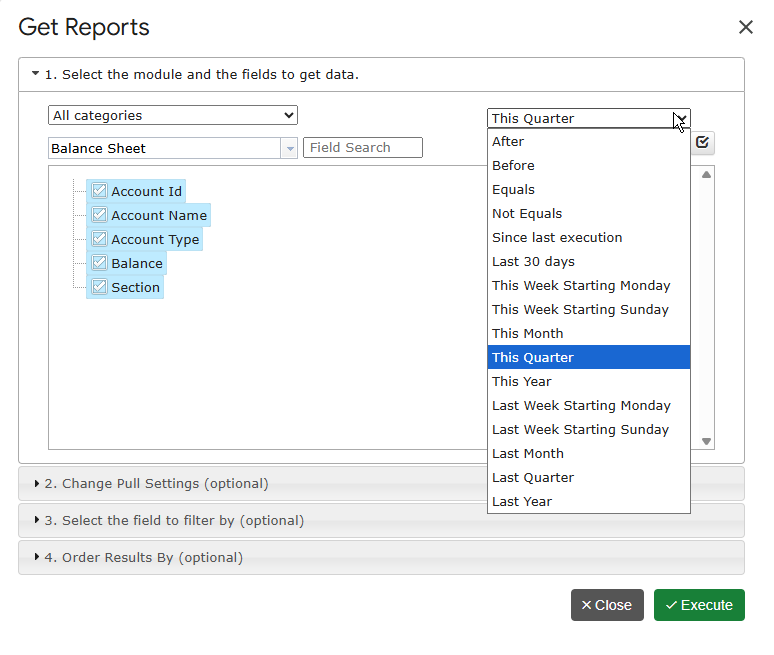
Next, open the add-on menu and choose the reports section. Pick Balance Sheet from the list. Then set the report date and run it.

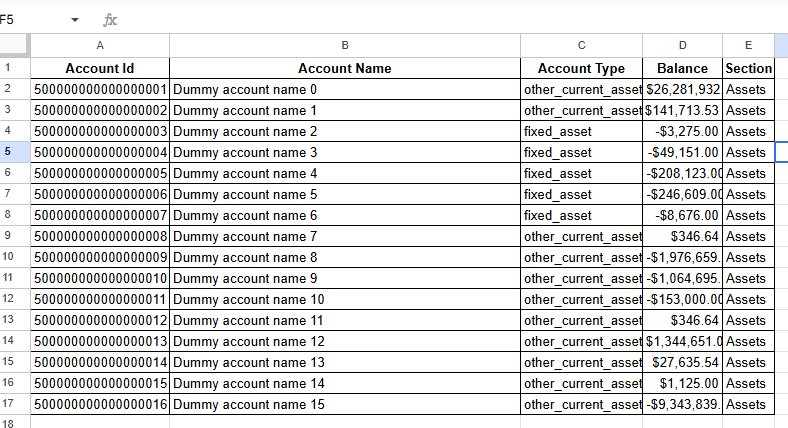
Within seconds, the sheet shows your assets, liabilities, and equity, rolled up from your general ledger. The report also includes a computed Net Income row, just like the one inside Zoho Books.

Need a different view? The catalog also includes Balance Sheet by Location, by Customer, by Vendor, and by Classes. Moreover, the Historical Balance Sheet shows your balance as of any past date. As a result, period-end snapshots and trend sheets become easy.

Step 3: Add the Profit and Loss

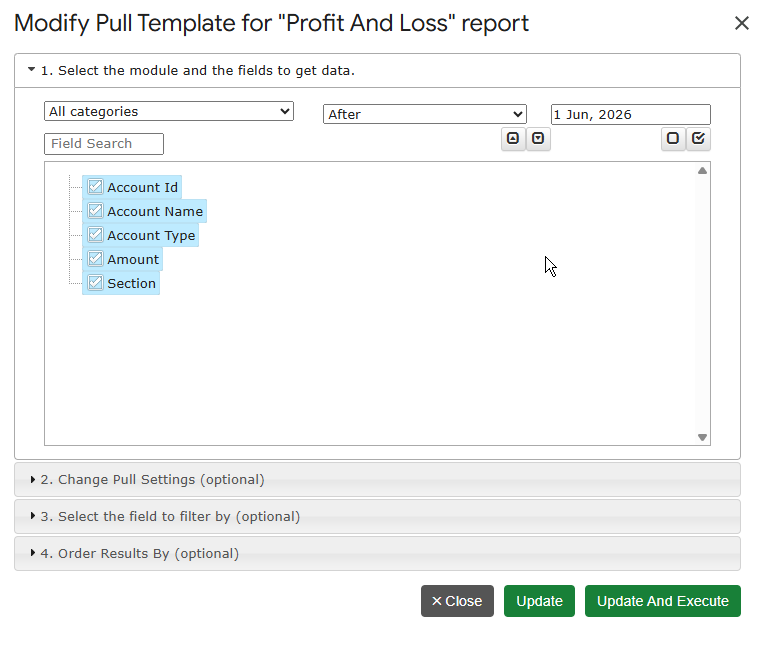
Now repeat the same steps and pick Profit And Loss. This is your income statement: Income, Cost of Goods Sold, and Expenses, with totals down to net profit.

A few useful variants:

  • Profit And Loss Variance – the current period next to the previous one, with the change in amount and percent.
  • Profit And Loss By Customer – see which customers actually make you money.
  • Profit And Loss Detail – every ledger line behind your income and expense accounts, so you can trace any number.

Step 4: Add the Cash Flow

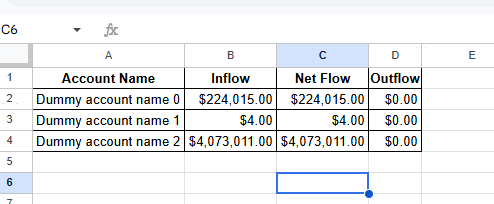
Finally, run the Cash Flow report. It shows money moving in and out of your bank and cash accounts, classified by counter-account. Likewise, you can split it by Location, by Customer, or by Classes, or run the Historical Cash Flow for any past period.

At this point, you have all three core statements in one spreadsheet. Add a summary tab with a few charts, and you have a live finance dashboard.

Step 5: Put the reports on a schedule

This step removes the monthly routine. Open:

Automation – Create Workflow

Pick the tabs with your reports and set a schedule – hourly, daily, or weekly. From then on, G-Integrator reruns each report and updates the sheet by itself. Therefore, the numbers your team sees are always current. You can also get an email after each refresh.

Beyond the big three: 75+ reports in the catalog

The three statements above are just the start. The full catalog holds more than 75 Zoho Books reports, for example:

  • Aged Receivables Detail and Aged Receivables Summary – who owes you, and for how long
  • Aged Payables Detail and Aged Payables Summary – what you owe your vendors
  • Sales by Customer, Item, or Salesperson
  • Budgets and budget-versus-actual views
  • General Ledger and full transaction lists

You can browse the whole list in the report catalog.

Frequently asked questions

Is there a free plan?

No, but there is a free two-week trial. You can test every report and workflow before you pay. After the trial, pick a plan on the pricing page.

Do the reports match the numbers in Zoho Books?

Yes. The add-on builds each report from your live Zoho Books data through the official API. So the totals match what you see inside Zoho Books at the same moment.

Can I change how a report looks?

Yes. The report lands in a normal Google Sheets tab. Therefore, you can format cells, add columns with your own formulas, and build charts on top. On the next refresh, the data updates in place.

Can I also export raw records, like invoices or bills?

Yes. Besides reports, the add-on pulls raw tables: Invoices, Bills, Expenses, Payments, Items, and more. For a walkthrough, see our guide on exporting Zoho Books invoices to Google Sheets.

Is my accounting data safe?

Yes. The add-on connects through Zoho’s official sign-in flow and never stores your password. Furthermore, data flows straight from Zoho to your own Google Sheet.

Get started

Install G-Integrator for Zoho Books from the Google Workspace Marketplace and start your free two-week trial. Five minutes later, your Balance Sheet, P&L, and Cash Flow will live in Google Sheets – and they will update themselves. Learn more on the product page or in the quickstart guide.

How to Export Zoho Books Invoices to Google Sheets (2026 Guide)

If you run your accounting in Zoho Books, sooner or later you need your invoices in a spreadsheet: to build a custom aging report, share numbers with a bookkeeper who lives in Google Sheets, or combine billing data with information from other systems.

The manual route – exporting a CSV from Zoho Books and importing it into Sheets – works exactly once. The moment an invoice is paid, edited, or voided, your spreadsheet is stale, and you’re back to exporting and re-importing.

In this guide, you’ll set up a live connection between Zoho Books and Google Sheets in about five minutes using G-Integrator for Zoho Books, a Google Sheets add-on. Your invoices – including line items – land directly in your spreadsheet and can refresh themselves automatically on a schedule.

What you’ll need

  • A Zoho Books account (any plan)
  • A Google account
  • The G-Integrator for Zoho Books add-on – install it from the Google Workspace Marketplace

That’s it. No API keys, no scripts, no Zapier tasks to count.

Step 1: Install the add-on and sign in to Zoho Books

Open a Google Sheets spreadsheet and install G-Integrator for Zoho Books from the Extensions menu (Extensions → Add-ons → Get add-ons, then search for “G-Integrator”).

Once installed, open:

Extensions → G-Integrator for Zoho Books → Zoho Sign In

Sign in with your Zoho account and grant access. The add-on uses Zoho’s official OAuth flow – your password is never shared with the add-on, and you can revoke access from your Zoho account at any time.

If your Zoho account has several organizations, pick the one you want to pull invoices from – you can switch organizations at any time.

Step 2: Pull your invoices into the sheet

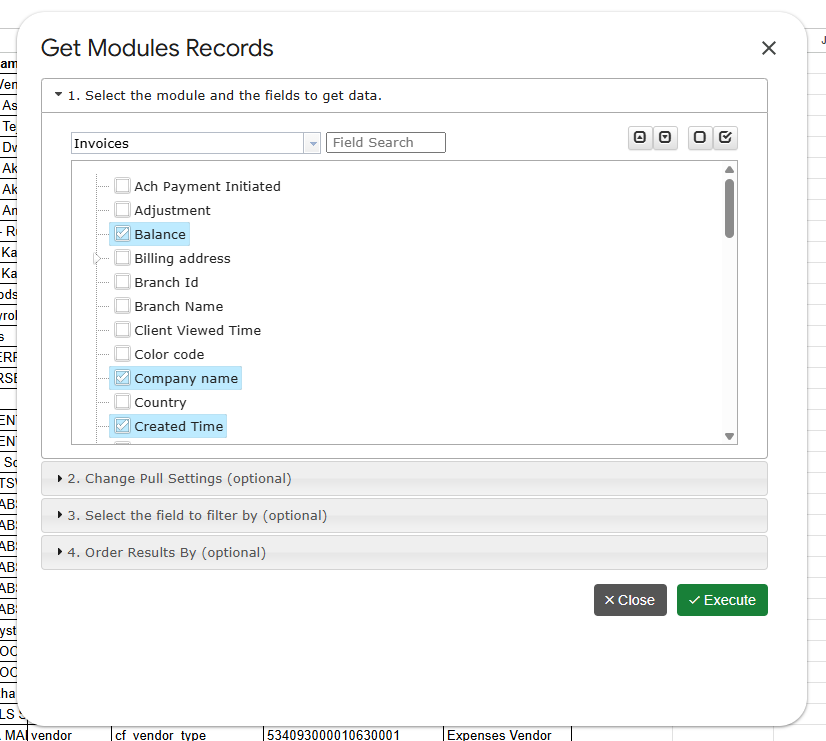
Open the add-on menu and click Get Module Records. In the dialog:

  1. Select Invoices from the table list.
  2. Pick the fields you need – invoice number, customer name, status, total, balance, invoice date, due date, and so on.
  3. Click to run the pull.

Your invoices appear in the sheet within seconds, one row per invoice – or one row per line item if you include line-item fields. Line items are flattened into rows automatically, so an invoice with five products becomes five analyzable rows. This is the detail level a CSV export from Zoho Books won’t give you in one file.

Filter to just the invoices you need

Don’t want your entire invoice history? Add filters in the same dialog – for example:

  • Status = unpaid for a live receivables list
  • Invoice date within the last quarter for period reporting
  • A specific customer for an account review

The pull settings are saved as a reusable template, so the next refresh uses exactly the same fields and filters.

Step 3: Schedule automatic refreshes

This is the step that eliminates CSV exports for good. Open:

Automation → Create Workflow

Choose the sheet with your invoice pull and set a schedule – hourly, daily, or weekly. From then on, G-Integrator re-runs the pull automatically and overwrites the sheet with current data. Paid invoices update their status, new invoices appear, voided ones drop off – with nobody touching the spreadsheet.

Workflows can also send you an email notification after each refresh, so your Monday-morning receivables sheet is waiting in your inbox before you’ve had coffee.

Bonus: skip the spreadsheet-building with 75+ ready-made reports

If the reason you’re exporting invoices is to build a report, you may not need to build anything. G-Integrator for Zoho Books ships with 75+ built-in financial reports that render directly in Google Sheets, including:

  • A/R Aging (by invoice or by customer)
  • Invoice Register and transaction lists
  • Balance Sheet, P&L and Cash Flow
  • Sales by customer / item / salesperson

Each report is generated from live Zoho Books data and can be put on the same automatic refresh schedule. See the full report catalog for the complete list.

Zoho Books CSV export vs. a live Sheets connection

Manual CSV exportG-Integrator
Line items includedSeparate exportFlattened into rows automatically
Data freshnessStale immediatelyAuto-refresh on schedule
FiltersRe-applied every timeSaved in a reusable template
Financial reportsBuild your own75+ built-in
Effort per update5–10 minutesZero

Frequently asked questions

Is there a free plan?

G-Integrator for Zoho Books has a free two-week trial period. After a trial, you will have to subscribe – see pricing.

Can I export bills, expenses, and payments too?

Yes – Invoices is just one of the available tables. You can pull Bills, Expenses, Payments, Credit Notes, Chart of Accounts, Items, Projects, and more. See the import guide.

Does it work with multiple Zoho Books organizations?

Yes. Sign in once and switch between organizations from the add-on – each pull template remembers which organization it belongs to.

Can I update Zoho Books from Google Sheets?

Yes. G-Integrator also supports uploads – update, insert or upsert Zoho Books records straight from your sheet. See uploading data.

Is my accounting data safe?

The add-on connects through Zoho’s official OAuth API – no passwords are stored, and data flows directly between Zoho and your Google Sheet. Access can be revoked from your Zoho account at any time.

Get started

Install G-Integrator for Zoho Books from the Google Workspace Marketplace, sign in, and your first invoice export is a two-click job. Learn more on the product page or jump straight to the quickstart guide.

Introducing Subscription Manager: Self-Service Billing for Your G-Integrator Account

We’re excited to introduce the G-Integrator Subscription Manager — a new self-service portal that puts you in full control of your G-Integrator subscription, whether you’re using our HubSpot, Zoho CRM, or Zoho Books integration. No more emailing support to check your plan, add a teammate, or grab an invoice: it’s all just a sign-in away.

How to access it

You can reach the Subscription Manager in two ways:

Sign in with your Google account

Access is as simple as signing in with the Google account you use with G-Integrator. There’s nothing to install and no separate password to remember — your identity is verified securely, and the portal automatically finds your subscription based on your account email.

One portal, all your G-Integrator products

If you use more than one G-Integrator product, switching between them is a single click. The portal supports:

  • G-Integrator for HubSpot
  • G-Integrator for Zoho CRM
  • G-Integrator for Zoho Books

Just pick a project from the dropdown and every section below — subscription status, plans, invoices, and license groups — updates for that product.

Instant subscription lookup

The Subscription lookup card gives you an at-a-glance view of your account: license status, current plan, days remaining, days left in trial, customer and subscription IDs, and — for group subscriptions — how many seats are on your license. Admins can also look up any account by email, which is handy for quickly answering a customer’s support question.

Switch plans yourself, with instant estimates

The new Subscription plans card lists every available plan side by side with pricing, and lets you switch instantly — no support ticket required. Before you confirm, the portal shows you exactly what will happen: any prorated charge due now, credits applied, or credits issued for the unused period of your current plan, so there are never any surprises on your next invoice.

Need to update the card on file? A single button opens a secure, Chargebee-hosted page to update your payment method — your card details never touch our servers

Group subscriptions with a built-in discount

Premium plans now support group subscriptions: set the number of seats you need directly on the plan table, and every seat beyond the first automatically gets a 15% discount. It’s the easiest way to license an entire team under one subscription.

Share your license with your team

Once you’re on a Premium plan, the License group card lets you share your license with teammates by simply pasting their email addresses. You can review who’s currently in your group at any time, and add more members whenever your team grows.

Heads up: reducing your seat count — including switching off a Premium plan — disbands the license group, so all members lose access immediately. The portal always warns you before you confirm a change like this.

All your invoices, one click away

The Invoices card lists your full billing history — date, invoice number, status, total, and amount due — with a one-click PDF download for each invoice. No more digging through email for a receipt.

Built for security

Every request is authenticated with your verified Google identity, and only a small, whitelisted set of G-Integrator admins can act on behalf of another account — for example, to help a customer during a support request. Everyone else can only ever see and manage their own subscription.

Try it now

The Subscription Manager is live today for all G-Integrator customers. Head to g-integrator.com/subscriptions or open About → My subscription from within any G-Integrator product, sign in with your Google account, pick your product, and take control of your subscription — plans, teams, and invoices, all in one place.

What’s New: HubSpot Analytics & Data Breakdowns, Right Inside Google Sheets

We’ve shipped two new template-driven dialogs in G-Integrator for HubSpot that pull HubSpot analytics straight into your spreadsheet — no more CSV exports, no juggling external BI tools. Build once, save as a template, refresh on demand.

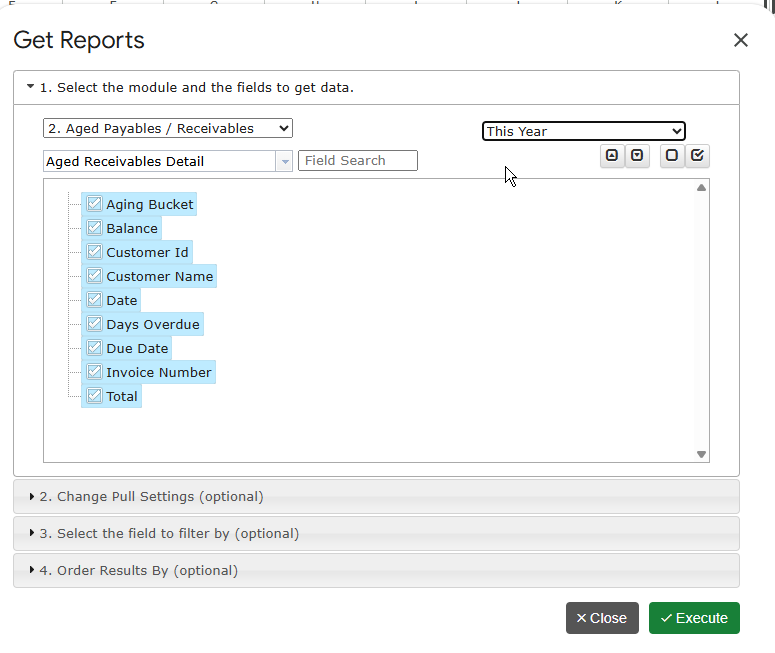
1. Get Custom Reports — reusable HubSpot analytics templates

The new Get Custom Reports dialog lets you assemble a HubSpot analytics report once and run it on demand. Pick the scope — contacts, companies, deals, tickets, or custom objects — define your filters, choose your columns, and save the configuration as a reusable template. Anyone on your team can run it later, in any sheet, without rebuilding it from scratch.

  • Scope-aware reports for contacts, companies, deals, tickets and custom objects.
  • Composite filter logic — combine multiple conditions in a single query.
  • Reusable templates, shareable with teammates via the Cloud Templates manager.
  • One-click refresh via the existing Refresh HubSpot Data action.

2. Data Breakdowns — pivot HubSpot data without leaving the sheet

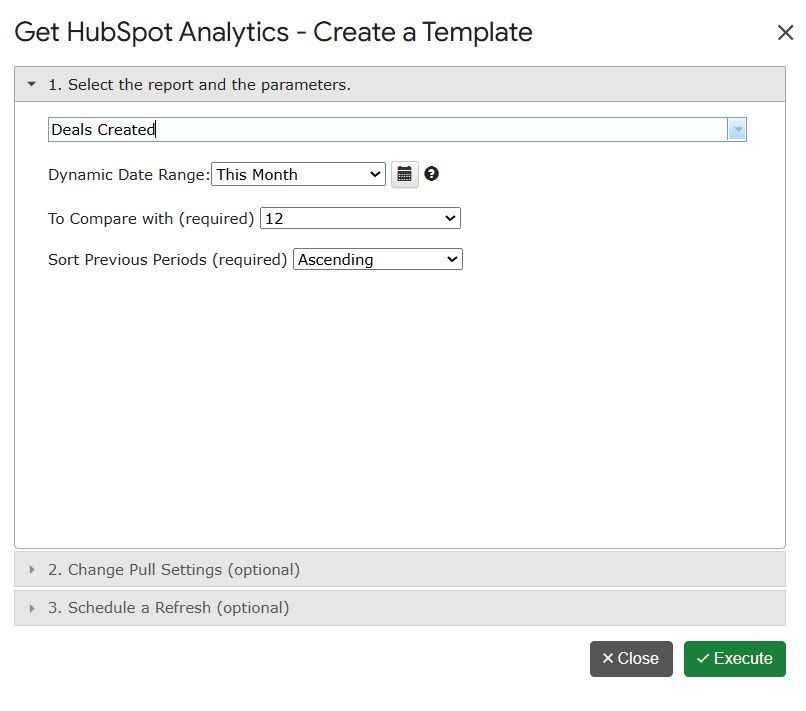
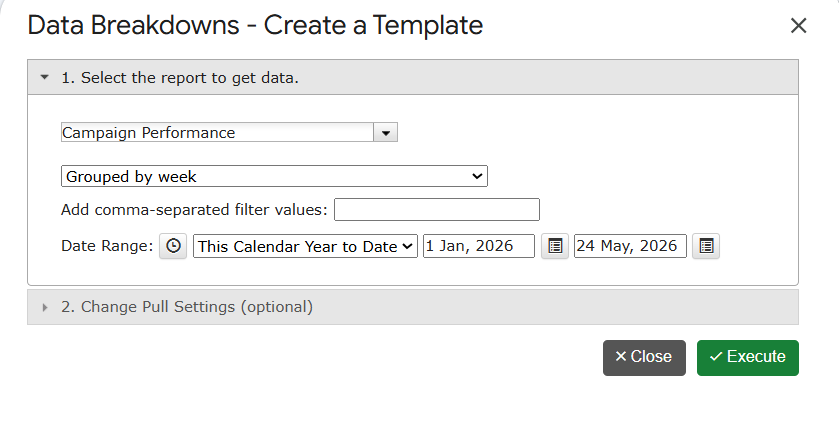
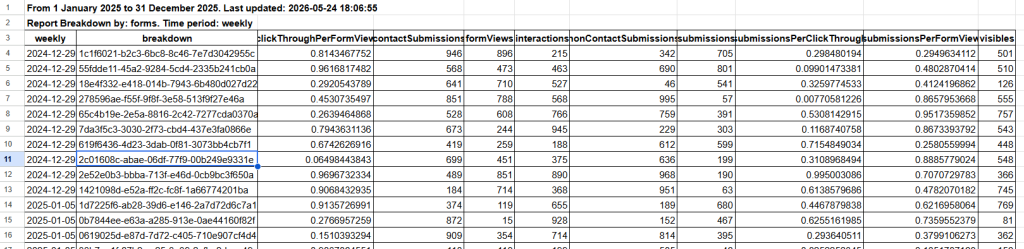
The new Data Breakdowns dialog is the fastest way to slice HubSpot data by dimension and frequency. Pick a metric, group it by one or more dimensions, choose a frequency (daily, weekly, monthly, quarterly), and the breakdown streams directly into your active sheet — with totals, formatting, and refresh metadata wired up automatically.

  • Dimension × frequency breakdowns — pivot-style summaries without a pivot table.
  • Automatic paging — large datasets stream into the sheet page by page.
  • Refresh-ready — sheet metadata is captured so the report refreshes in place.
  • Premium & Lite aware — advanced features unlock automatically with your subscription.

Getting started in 30 seconds

  1. Open any Google Sheet.
  2. Go to Extensions › G-Integrator for HubSpot and sign in if you haven’t already.
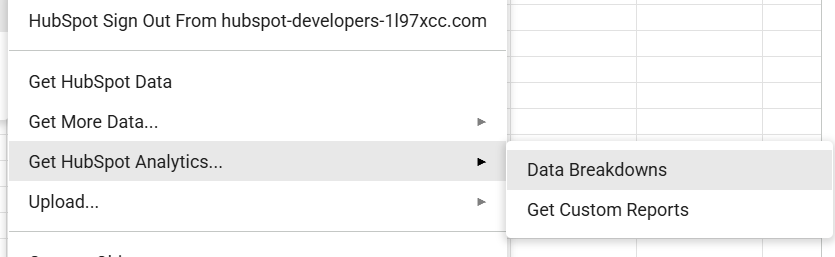
  3. Choose Get HubSpot Analytics… and pick the dialog you need.
  4. Configure filters, save as a template, and run.
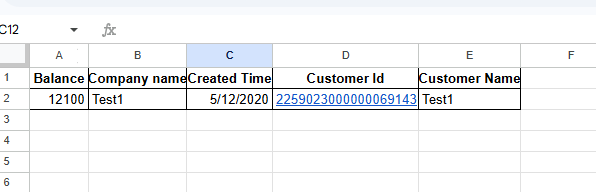
The data was randomized

Questions? Email support@g-integrator.com or visit the FAQ page.