Upload to multiple tables

Attention all HubSpot users! We have some exciting news for you. The G-Integrator for HubSpot just got even better. We have added new functionality that will allow you to upload data to multiple tables at once. This means that you can now create new deals and simultaneously add associated contacts and line items with ease.

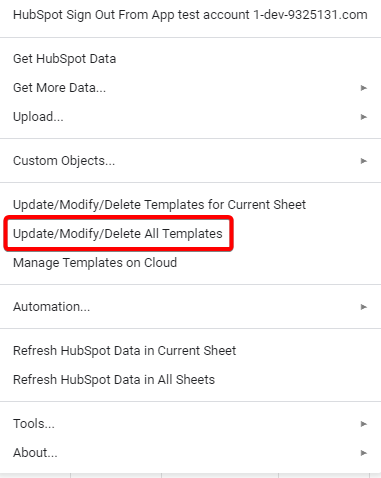
To use this new functionality, you will need to open the menu “Upload” → “Upload to HubSpot multiple tables”. From there, you can select the master table, which in this case would be “Deals”. Then you will need to add field mapping for it. Once that is done, you can select the detailed table, which could be “Contacts”. Again, add the field mapping for this table. If you have another detail table, you can add that as well.

With this new functionality, you no longer need to upload data to each table separately, which can be time-consuming and prone to errors. Instead, you can upload all the necessary data in one go, saving you time and effort. This is especially useful for those who have complex data structures in HubSpot, where multiple tables are linked together.

The G-Integrator for HubSpot has always been a great tool for managing sales data, but with this new functionality, it has become even more powerful. You can now upload data to multiple tables with ease, without having to worry about errors or missing information.

Let’s have a look at it. In our example, we will upload to HubSpot five deals. Each deal row in the spreadsheet will also have a first name, last name, and email of the associated contact and name, price, and SKU of the line item.

In summary, the G-Integrator for HubSpot now supports uploading data to multiple tables, making it easier and more efficient to manage your sales data in HubSpot. To use this new functionality, simply open the menu “Upload” → “Upload to HubSpot multiple tables”, select the master table, add the field mapping for it, and then select the detailed tables and add field mapping for them as well. If you have any questions about this new functionality or need help setting up your integration, please don’t hesitate to contact our support team.

New HubSpot tables added

Dear clients!

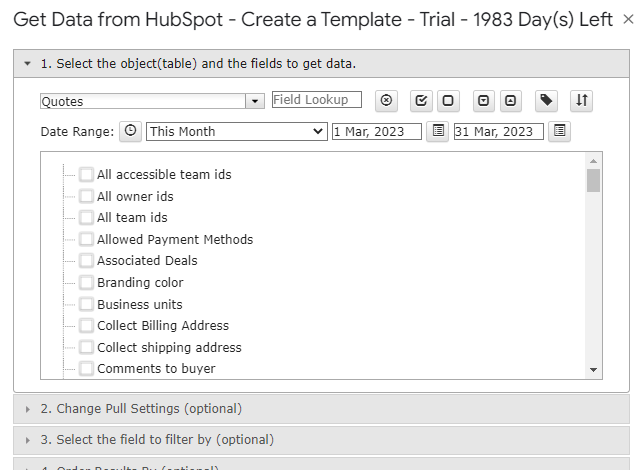
We are thrilled to announce that G-Integrator for HubSpot has been updated with three new tables that will make your experience even more efficient and streamlined. Our latest update now includes the following:

  • Feedback Submissions
  • Goals
  • Quotes

We believe that these new features will help you optimize your business processes, allowing you to focus on what you do best.

As always, we welcome any feedback or requests you may have, and are committed to continuously improving G-Integrator for HubSpot to meet your evolving needs.

Thank you for choosing G-Integrator for HubSpot, and we look forward to supporting your business.

Best regards, The G-Integrator Team.

Assoociations upload

Dear clients!

We are excited to announce that you can now upload a variety of associations to your HubSpot account using G-Integrator. With this latest update, you can now seamlessly integrate and manage Contact, Company, Deal, LineItem, and Ticket associations with your HubSpot account.

Let’s have a closer look at the following task: adding a contact to the existing deal.

There are several ways how to associate the contact with a deal, it depends on if you already have added contact/company or now.

So, if you already have the deal and you want to add contact and associate it with the deal, you can do the following:

  1. Add the contacts to the spreadsheet.
  2. Use the “Upload HubSpot Data to…” menu and select the Contacts table.
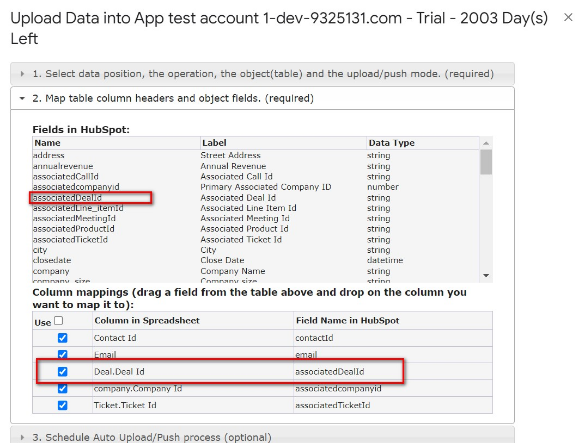
  3.  Map the “associatedDealId” to the deal ID column in your spreadsheet.

If you already have contact and want to associate it with the deal, you still can do the same steps, but, this time, use the “Update” or “Upsert” operation instead of Insert. Or you can update deals by adding associatedContactId.

And, of course, you can do the same not only for Contact but for Company, Product, LineItem, and Ticket.

Enhance Your HubSpot Experience with G-Integrator and New Engagement Modules

Dear Clients!

We are pleased to inform you that our business partner, HubSpot LLC, added new Engagement modules to the HubSpot API.

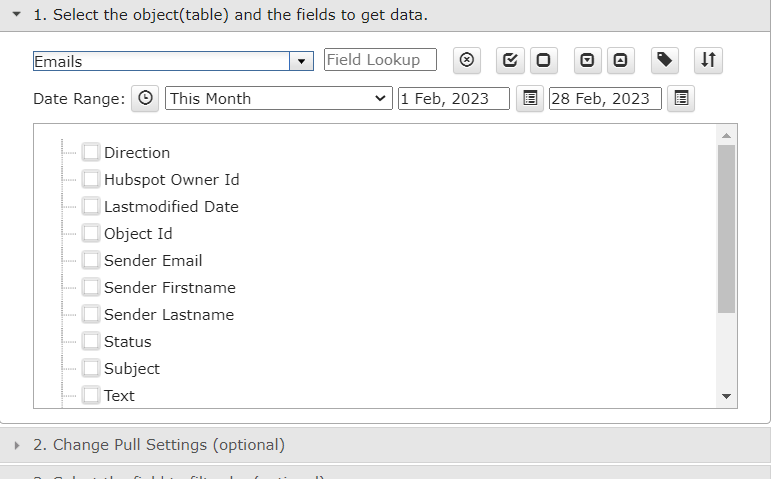
G-Integrator for HubSpot is now integrated with these modules, which means you can easily download them to your Google Spreadsheet. This will help you to organize and keep track of all your engagement activities in one place, without having to switch between multiple platforms.

The Engagement modules included are:

  • Communications
  • Emails
  • Notes
  • Postal mail
  • Tasks

With these modules, you can now easily see all your engagement activities in one place, and make informed decisions based on the data. You can also customize the data to suit your specific needs and generate reports in real-time.

To start using these modules, simply log in to your G-Integrator for HubSpot account and select them from the “Get HubSpot Data”.menu.  If you need assistance, our support team is always here to help.

These new Engagement modules will help you get the most out of your HubSpot experience and improve your overall productivity.

If you have any questions or need assistance, please do not hesitate to reach out to us.

Service Spreadsheets timed out error

Dear clients, sometimes you will see the “Service Spreadsheets timed out” error while using G-Integrator to update the spreadsheet.

This is a known issue in the Google Script engine. We have a workaround for this. While it can’t give 100% reliability, it still works quite well, despite it will slow down the execution.

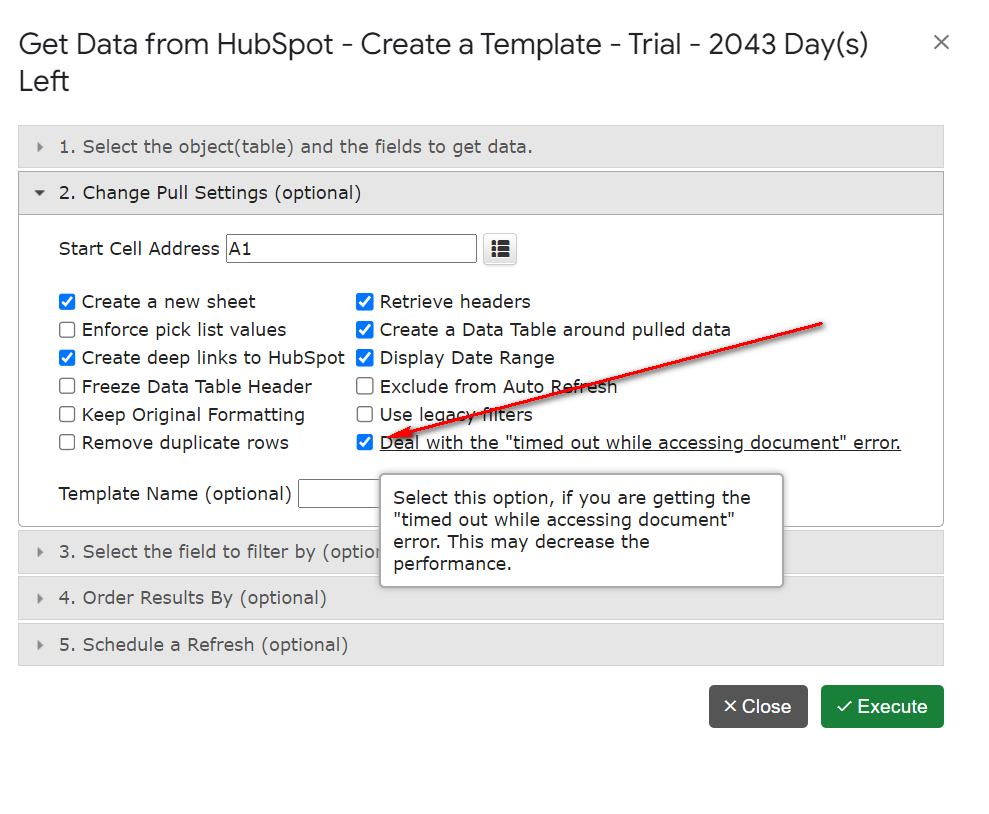
S, if you have got this error, please check the “Deal with timed out while accessing document” checkbox in the “Change Pull Settings” tab. We hope, that this will solve the problem.

Insert, Update, and, now, Upsert

Dear clients! You know that HubSpot is a great CRM – this is why you are using it. But even the best program can be even better.

There are features in other CRMs, that I would like to see in HubSpot. For example, both Salesforce CRM and Zoho CRM have a nice ” upsert ” feature: when you upload a deal, for example, Salesforce will update an existing deal if you provide a Deal ID or create a new one otherwise.

To be honest, Hubspot has some limited upsert functionality, but not for each object. So we have decided, that our clients would like to have this feature for HubSpot, and we have implemented it in the G-Integrator for HubSpot add-on.

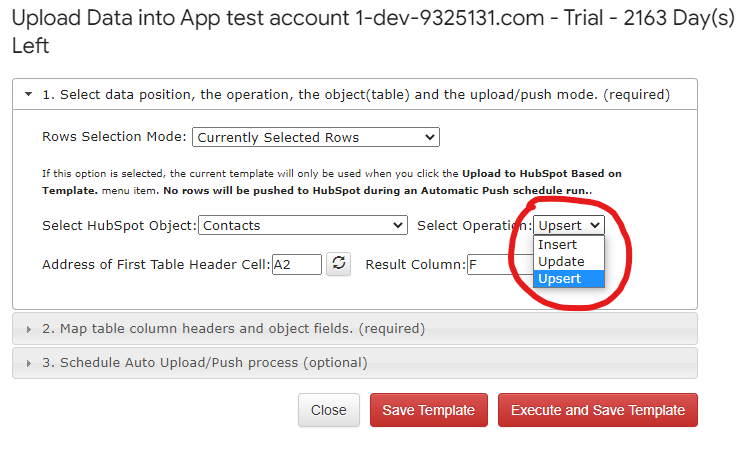
It works simple: when you create an upload template, you can select between “Create”, “Update” or “Upsert” operations:

If you select “Upsert”, you will have to map the ID field, just like for the “Update”. But, opposite to “Update”, you will not get an error if the ID value is empty – a new record will be created instead. Please see the screenshot below:

We hope that you will find this small improvement useful. Please send us any requests or ideas on how to improve the application: if it’s useful for our clients and possible to implement, we will add it.

Dynamic filters

Dear clients! We want to share with you our most recent improvement: dynamic filters.

The dynamic filters will allow you to filter your data based on the values in the spreadsheet. Let me illustrate this functionality with a few examples:

Example 1: Filtering deals by name

Let’s create a template to select deals:

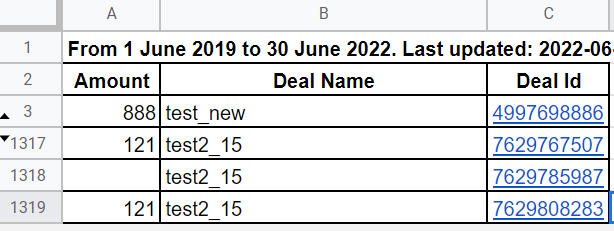
I’ve created a template to get Deals. Currently, it selects slightly over 1000 records:

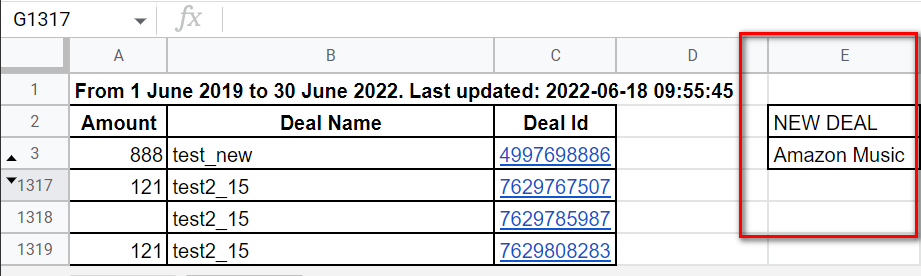
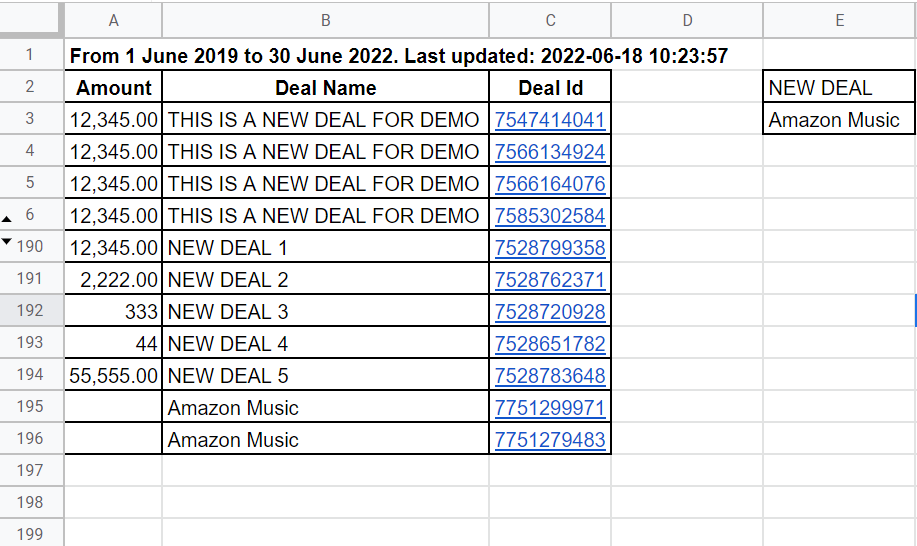
Now, let me filter it by the deal name. For this, I will enter the desired deal’s names into the column E of the spreadsheet:

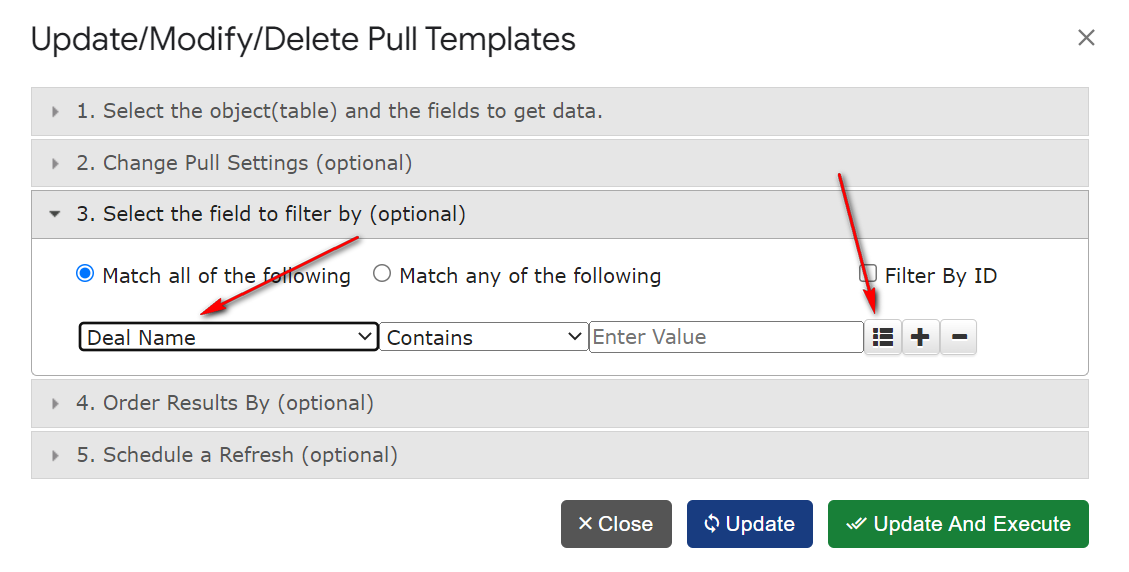
And I will modify the template to filter against these values. For this, I will open the template, select the field “Deal name” in the filter, and then will click the dynamic filter button:

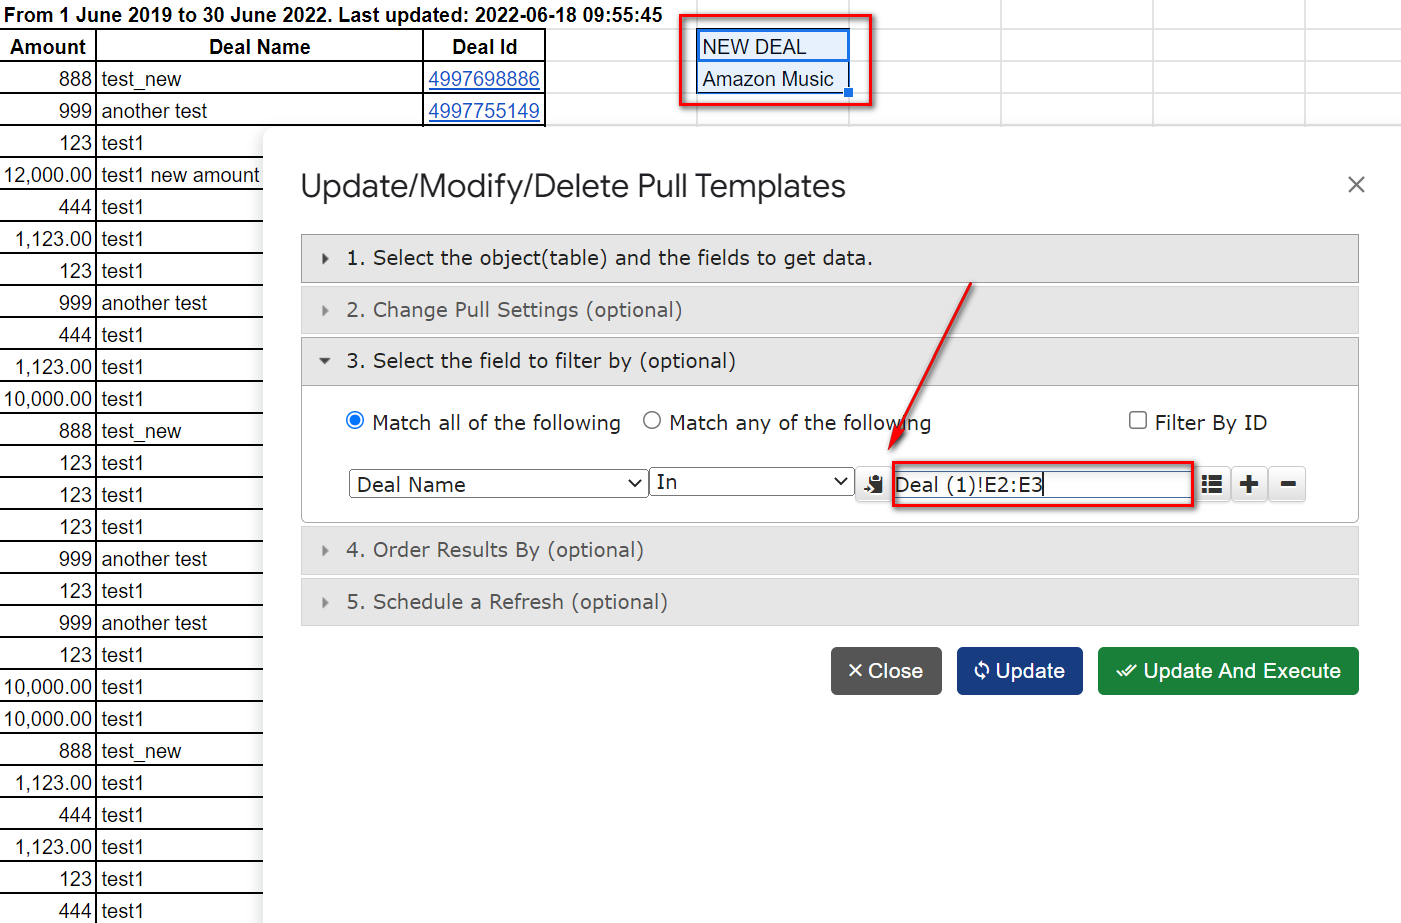
I will select the “In” operator. It means, that the Deal name should exactly match one of the values from the spreadsheet’s column.
For the source of the values, I can manually enter the range: “E2:E3” into the data source field, or I can select the values I want to use in the spreadsheet and then click the “copy range” button:

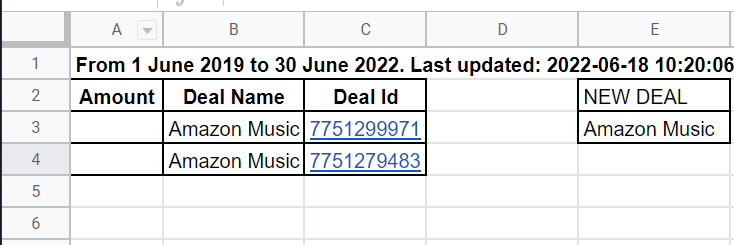
And let’s look at the result:

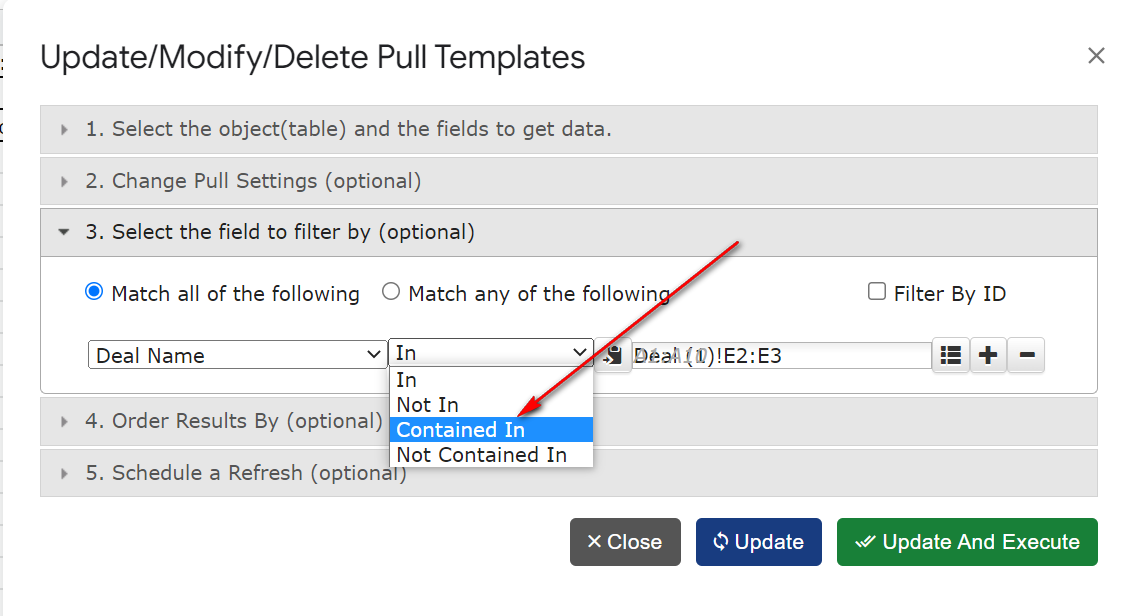
I can modify the filter to use the “partial match” instead of the “exact match”:

And the result will be the following:

Example 2: Filtering out Deals by ID

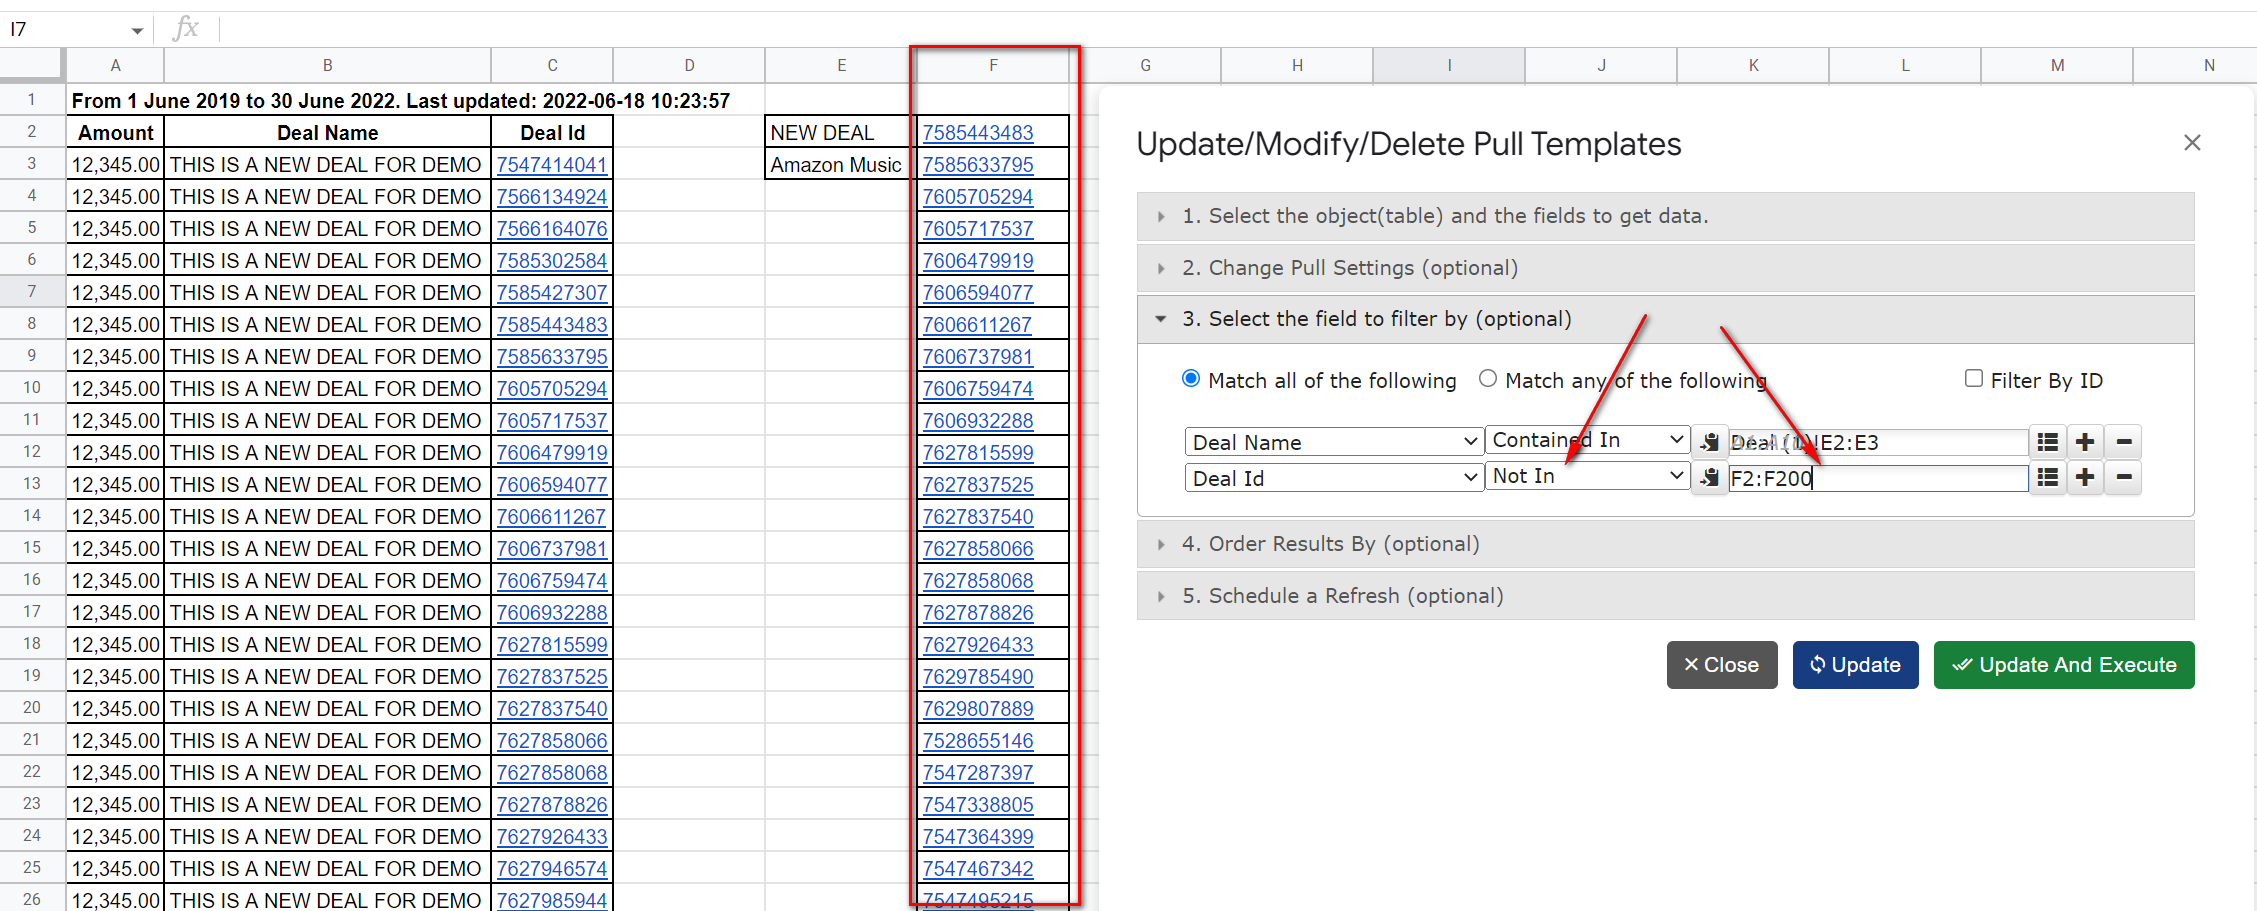
Let’s consider the same Deals template from the previous example, but, this time, in addition to the filtering by the Deal name, I want to exclude some deals based on the IDs. For this, I will copy the IDs I want to exclude into the column F, and I will use the “Not In” operator :

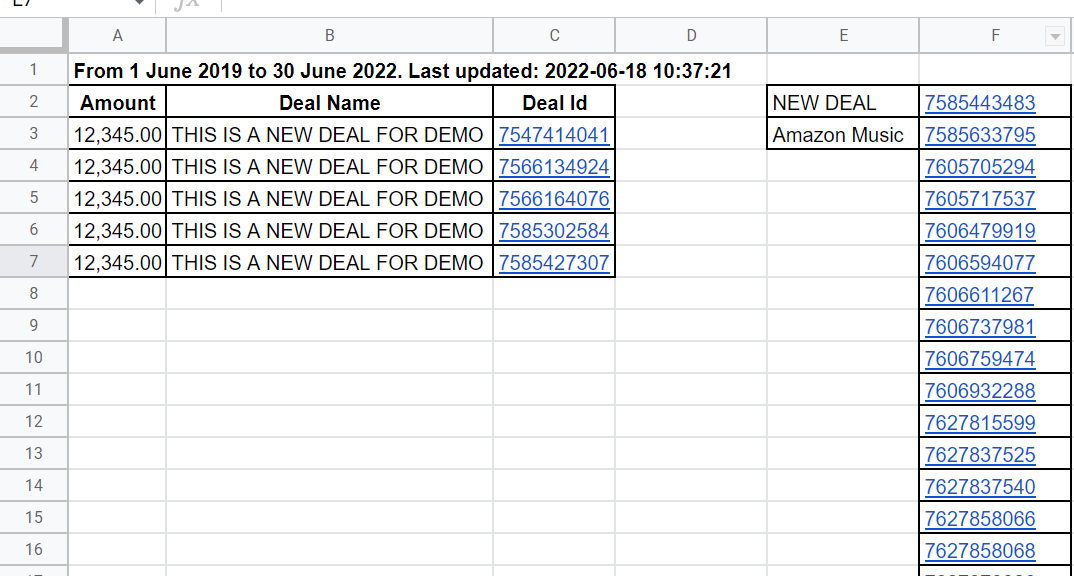
And the result will be much smaller:

Example 3: Dynamically provide data for the dynamic filter using the workflow

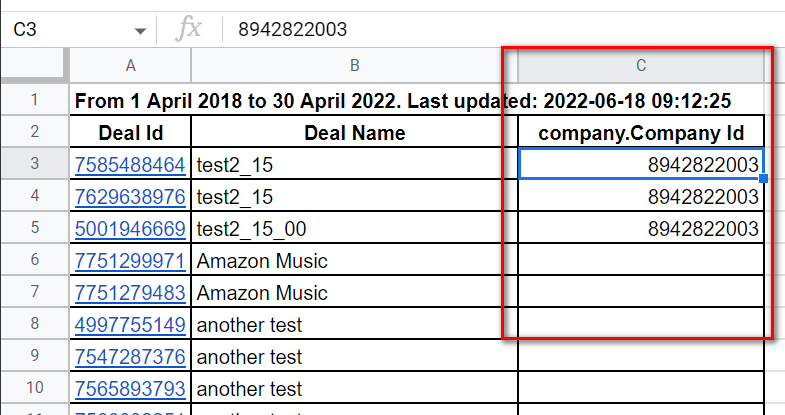
First, I will create the Deal template to get Deals with the Company ID:

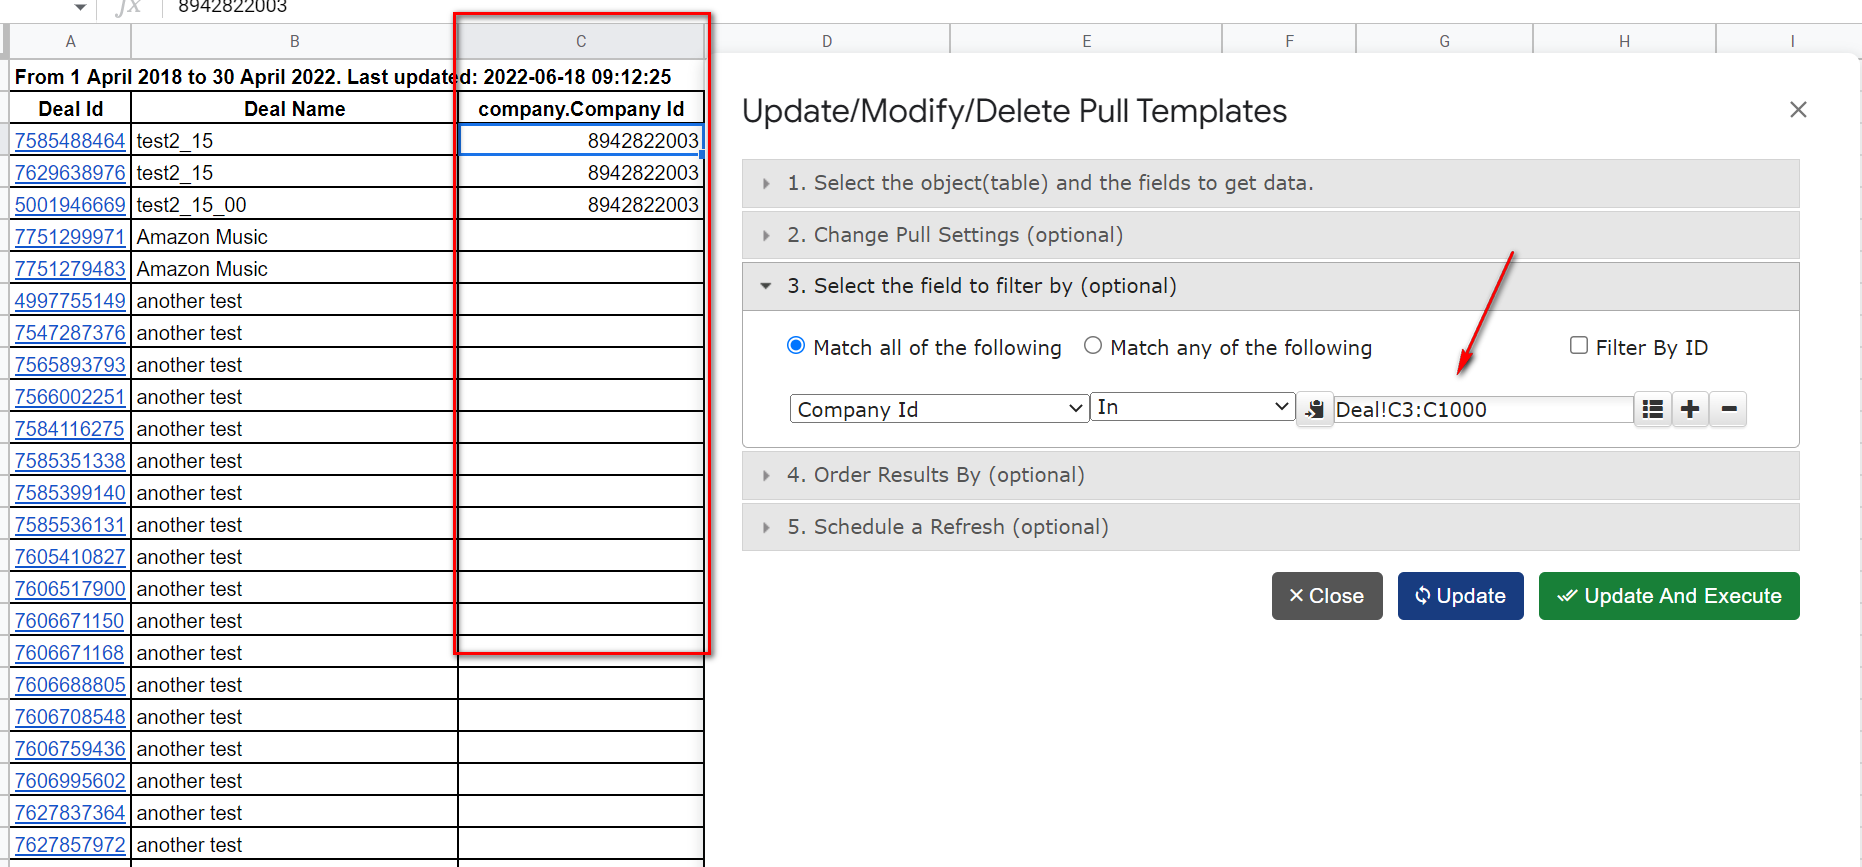
Now, I will create the Company template and I will add the dynamic filter with the data source kin column C, which was populated by the Deals template. For the presentation purposes, I will place this template’s data in the same Deals tab, despite it’s not required:

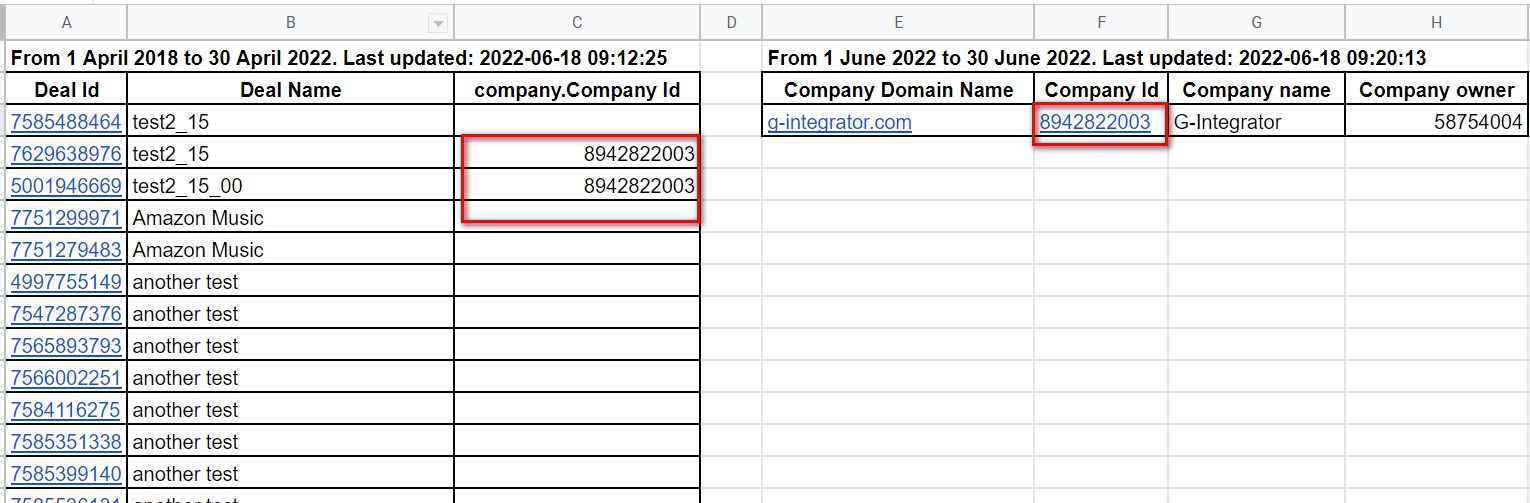
And now, let’s see the result:

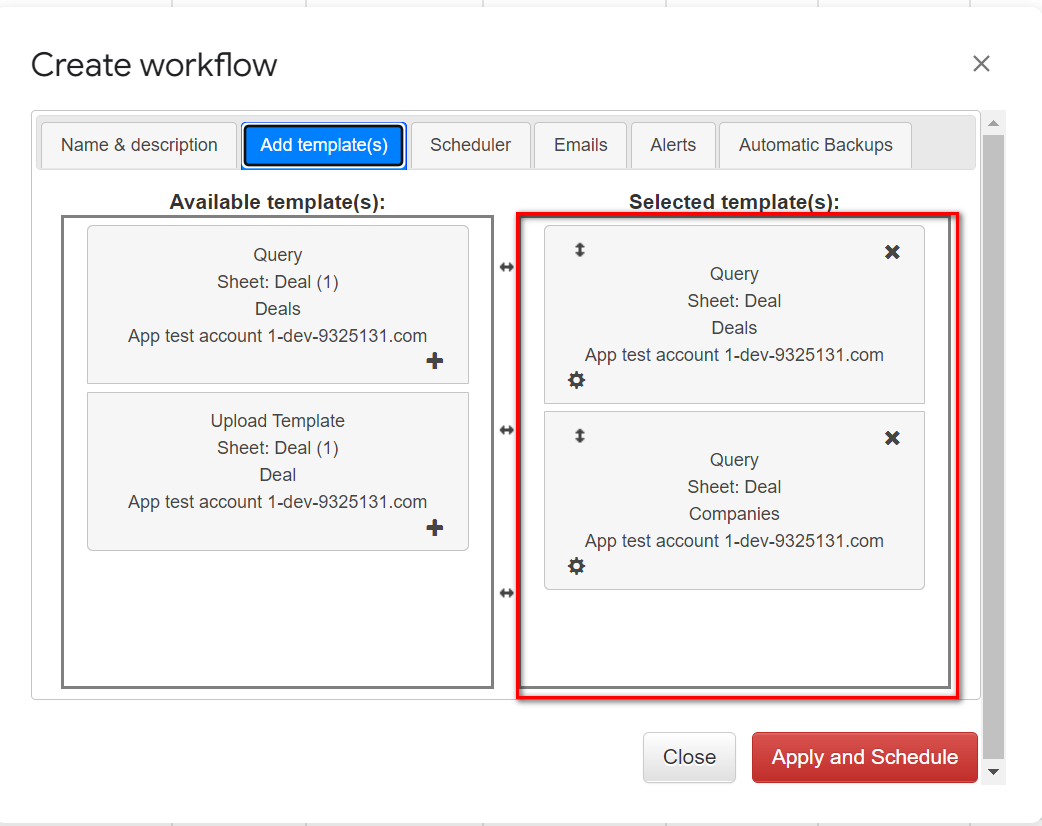
I can combine these two templates into the Workflow, and I will be able to see the detailed Company information for each deal updated automatically:

We hope that you will find this new feature useful and exciting!

Hubspot “Order By” improvements

Dear clients! We constantly trying to make our HubSpot add-on even more useful and convenient for you.

This time we want to present our latest improvements for the “Order By” feature:

  • Multiple “Order By” conditions.
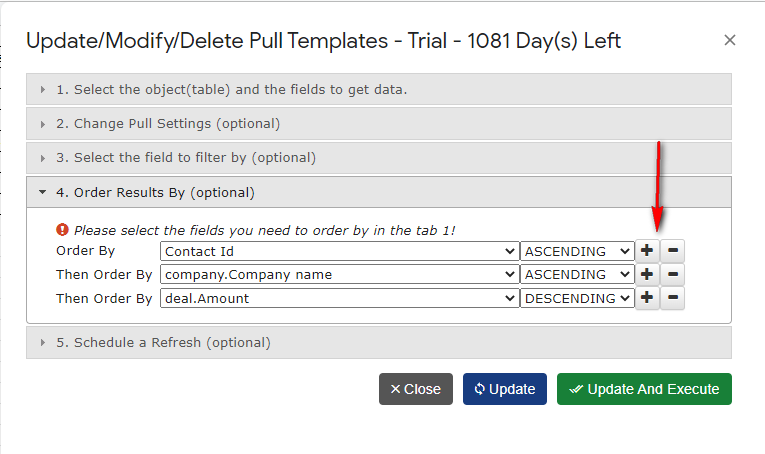
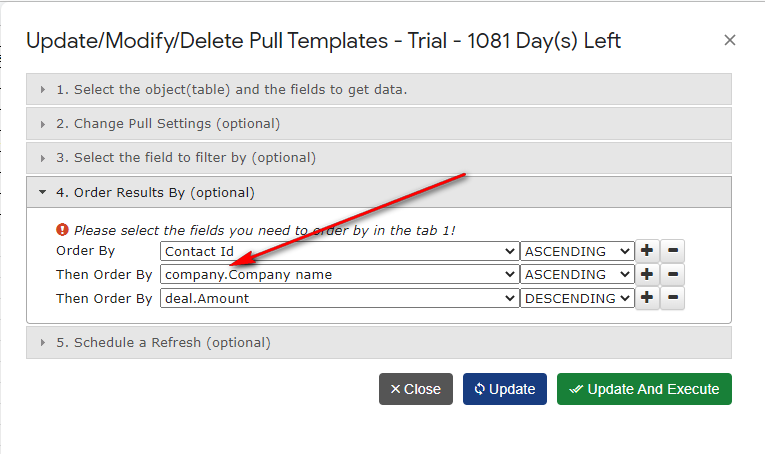
    Now you can order by as many columns as you want. Just use the “+” and “-” buttons to add/remove the order by conditions!
Multiple conditions
  • Allowing ordering by the fields from the children’s objects.
    We have changed our code, so now you can use not only first-level fields but any of the children’s fields also! The only condition is that you will have to download all the fields you want to use for ordering.
Using children’s fields for ordering by.
  • Showing only the fields that could be used for ordering.
    This is related to the previous feature. To avoid confusion, we will show you only the fields you can use for ordering. If you do not see the field you need, just go again to tab 1 “Select the object…” and check this field.

New filters for HubSpot – now default

Dear HubSpot addon clients!

We are happy to announce that the new filters module we have published a few weeks ago is default now!

Your existing templates still will use the old filters, but any new template will use the new filters by default.

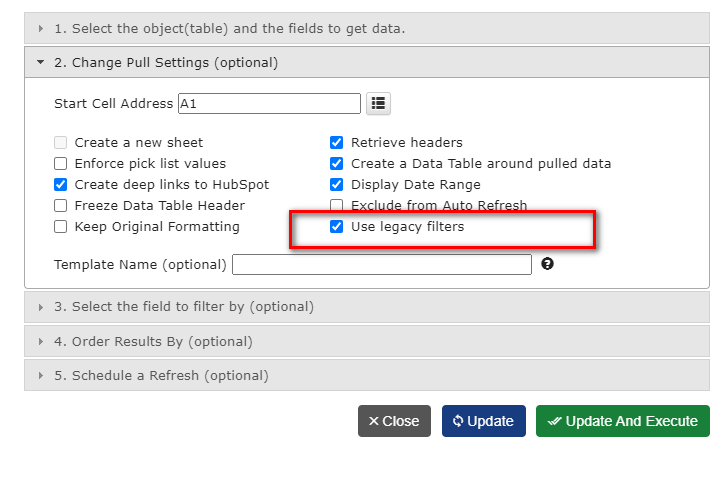
You always can easily switch between old and new filters module by clicking the option “Use legacy filters” in the “Change Pull Settings” tab:

Please let us know about any problems or concerns – here or by email: support@g-integrator.com

New filtering module

Dear clients! We are very excited to share with you our latest improvement in the HubSpot add-on: a new filtering subsystem!

The new filtering module is not fully compatible with the legacy one, so some of your queries would not work with it. To resolve this we will keep both filtering modules, and you can switch between them at any moment.

Currently, the legacy filtering subsystem is used by default – we will change this in a few weeks. To switch between old and new filtering modules, check/uncheck the option “Use legacy filters” in the “Change Pull Settings” tab. If you do not see the “Use legacy filters” flag, try to refresh the web page.

There are some key differences between old and new filtering:

  • In the new filtering, we made one global option to connect the filtering criteria: ” Match all of the following” or “Match any of the following”.
    If the table has a mandatory date filter in the 1st tab, it will be applied before any other filter using the logical ‘AND’ condition!
  • You do not have to click on the “+” button to apply the filter -it will be applied immediately as you configured it. The “+” and “-” buttons are used to add or remove the filtering criteria.
  • You will find many new filtering criteria, especially for dates.
  • Last, but not least: we have enabled many new fields to be used for the filtering. There may be some reasons why the previous owners restricted so many fields from the filtering, so it’s possible that some of the new fields would be a problem. Please notify us about any of it and we will investigate it ASAP.

We hope you will find the new filtering module more powerful and easy to use than the legacy one. We use that the same module for almost 2 years in our two other add-ons: G-Integrator for Zoho CRM and G-Integrator for Zoho Books and the clients found it helpful.

If you have any concerns or suggestions, please leave a comment here or email us: support@g-integrator.com