Cloud Templates

Dear clients, we are very excited to share with you our new cool feature: Cloud Templates!

Starting now, you can save your query, report, or upload template to our secured cloud storage. This way, you can use this template in any new spreadsheet or share it with your colleagues (assuming they are our clients also). This functionality is available only for our clients with the “Premium” subscription.

We hope you will find many reasons to use this new feature. Here are some examples:

  • Backup: by saving the template to the cloud, you can have a copy of your template in case you will need to roll back the recent changes
  • Migration: you can save the template and use it in another spreadsheet
  • Sharing: you can share the template with any other G-Integrator client
  • Copy/paste: You can save the template and open it in the same document as a new one

Working with the templates

Please see the short video or read detailed description below.

Saving to the cloud.

You first have to select the “Update/Modify/Delete Templates for Current Sheet” menu to upload the template. You will see the new “cloud” icon to the right of the template name. After clicking it, you will get the following form:
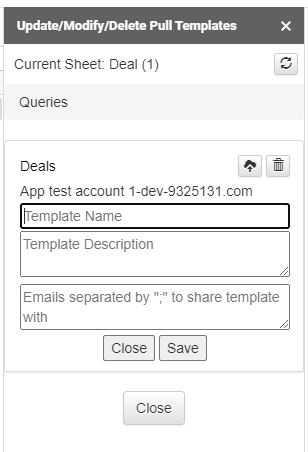
Please enter the template name and description, and an optional semicolon-separated list of emails to share with.

After clicking “Save” button, your template will be uploaded to the cloud.

Managing templates in the cloud.

After saving the template, you can use it by clicking the “Manage Templates on Cloud” menu (if you do not see it, just refresh the page in your browser).

You will see the following options:
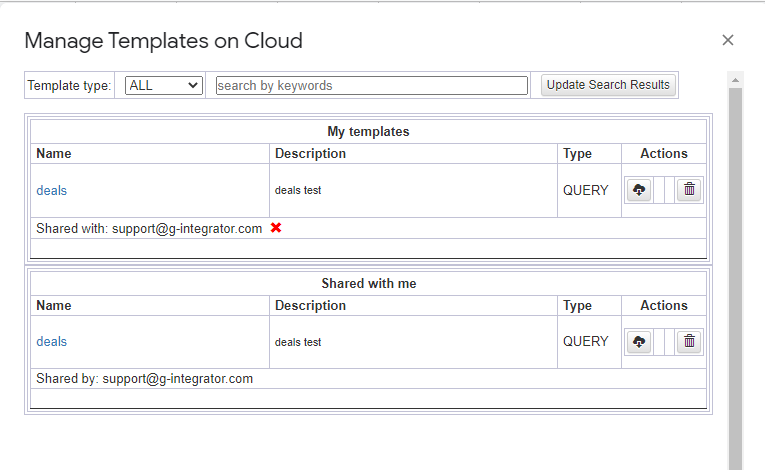
There are two sections: “My templates”, which shows the templates that you have created, and “Shared with me”, which shows templates shared with you.

With your templates, you can do the following:

  • Open the template – by clicking its name or the “cloud” icon in the “Actions” column. After opening, you can work with the template in the usual way.
  • Delete the template. Shared copies of the template will also be deleted.
  • Revoke the share by clicking on the red cross right to the email.

For shared templates, you can:

  • Open it just like you would open your own template.
  • Remove the share: the original template will not be changed.

We hope you will find this feature helpful. We will be happy to get your feedback and suggestions: here or by email: support@g-integrator.com

.

Multiple organizations in Zoho Books

Dear friends!

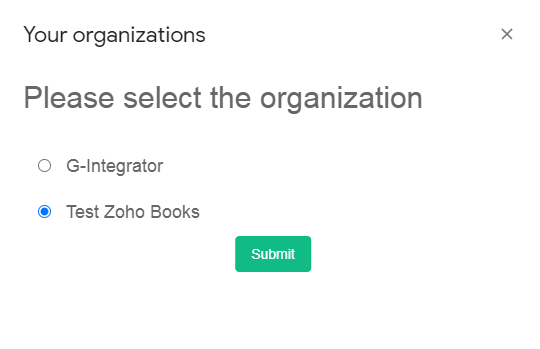
Today we have improved our Zoho Books add-on. Now, if you account have multiple organizations, you will be able to choose which one to use. The previous behavior was to automatically select the default one.

You will be offered the option to choose right after the login to your Zoho Books account. If you already logged in and want to change your organization, you will have to log out / log in (for the first time only).

If you want to switch, click the “Switch Organization” menu option any time.

Using dynamic filters to integrate Zoho CRM and Zoho Books (or any other product)

Dear friends! We are very proud to start our blog with a fascinating and useful feature.

In this post, I will demonstrate how you can integrate your Zoho CRM with another system, using our G-Integrator for Zoho CRM. In this example, I will integrate it with Zoho Books, because we have our G-Integrator for Zoho Books add-on, but it can be anything as long you can write data into the Google Spreadsheet – there are many add-ons on Google marketplace for different systems.

The scenario

We want to show Zoho Books Invoices for all the contacts from the Zoho CRM Deals.

How to synchronize.

  • First, we will link contacts from Zoho CRM and Zoho Books by the “Email” field.
  • Then, we will link Zoho Books Invoices and Zoho Books Contacts by the “Customer ID” field.

What you need for this.

Steps

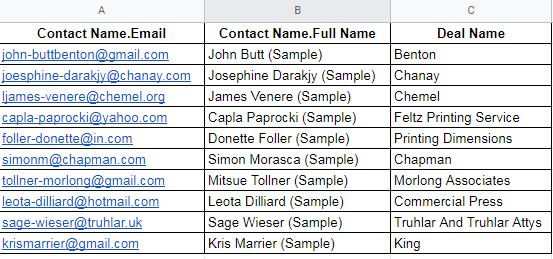
  1. Using the “Zoho CRM” add-on, download the “Deals” module, selecting the following fields:
  • “Contact Name.Email”
  • “Contact Name.Full Name”
  • Deal Name

For the synchronization, we will need only “Contact Name.Email”, other fields are just for convenience.

2. Using the “Zoho Books” add-on, select the “Contacts” module, selecting the following fields (again, we really need only “Contact Id”):

  • Contact Id
  • Contact Name
  • Email

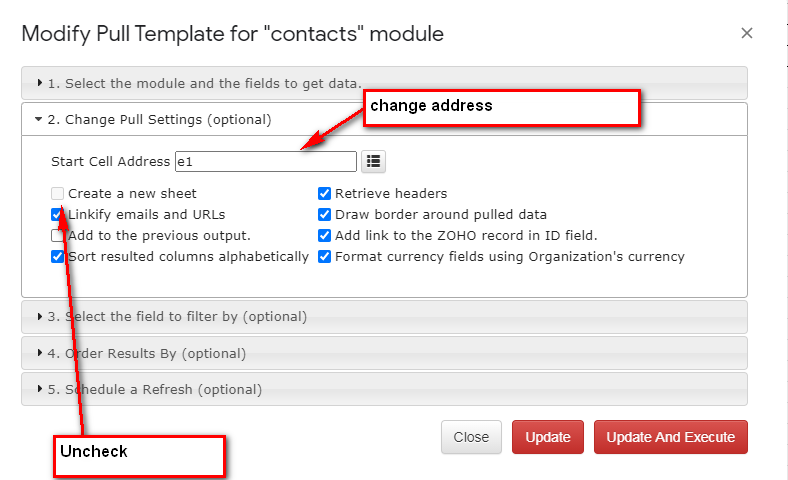
For the convenience, we will update Pull settings to keep it on the same tab

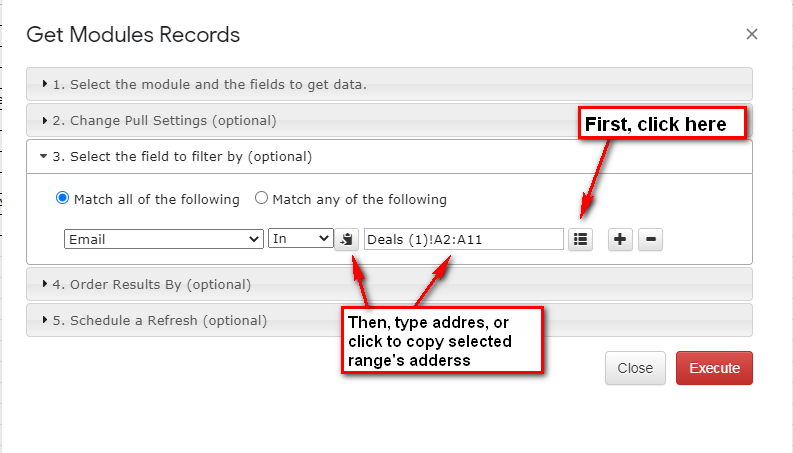
And we will use “Dynamic filters” to select only the records where email is in our Deals emails:

2. Using the “Zoho Books” add-on, select the “Invoices” module, selecting the following fields:

  • Customer Name
  • Date
  • Invoice Id
  • Invoice Number
  • Total

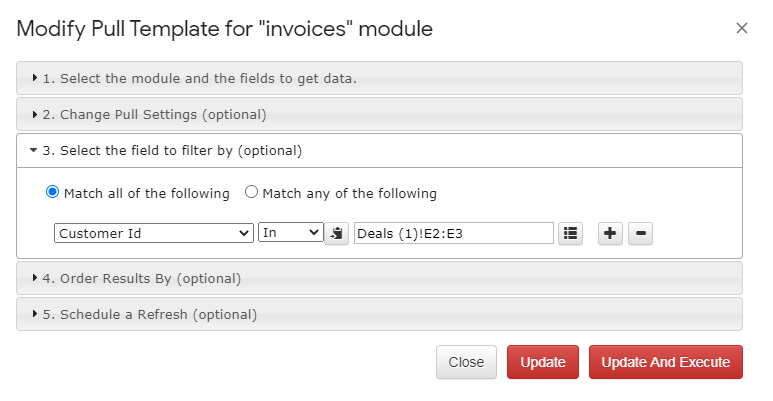
And again, we will use dynamic filter to link the “Customer ID (which we do not show) with the “Contact ID” from Contacts

And this is all! Click on the image below to see it full size.

And, if the records from “Deals” will be updated, we just need to refresh Zoho Books queries to update Invoices. Enjoy!

Conclusions

Of course, there are many other ways to use the dynamic filter – you can integrate Zoho CRM not only to Zoho Books but to any other accounting system, like Xero or QBO, using any of the available in the Google Marketplace add-ons. Or you can add data for the integration manually, by copy/paste.

Also, you can integrate modules inside Zoho CRM or Zoho Books – please see the short demo video of the linking Contacts module to the Deals module by Contact.ID in G-Integrator for Zoho CRM:

This is our new functionality and there is a lot to improve. Please help us by sending your requests and bug reports – you will be heard!